
How to Install a Home Thermostat. Looking to take control of your home’s comfort and save on energy bills? Installing a home thermostat yourself is easier than you might think.
Imagine adjusting the temperature with just a tap, making your home cozy in winter and cool in summer—all while cutting costs. In this guide, you’ll discover simple, step-by-step instructions to install your thermostat quickly and safely. By the end, you’ll have the confidence to upgrade your home’s heating and cooling system without waiting for a technician.
Ready to get started? Let’s dive in!
Choosing The Right Thermostat
Choosing the right thermostat is key to controlling your home’s temperature and energy use. The right choice ensures comfort and saves money. Consider the types of thermostats available, their compatibility with your HVAC system, and the smart features they offer.
Types Of Thermostats
Thermostats come in several types. Manual thermostats let you set one temperature. Programmable thermostats allow scheduling for different times and days. Digital thermostats show clear temperature readings. Smart thermostats connect to Wi-Fi and let you control settings from a phone.
Compatibility With Hvac Systems
Check if the thermostat works with your heating and cooling system. Some thermostats fit only specific systems. Look for compatibility with furnace, heat pump, or central air units. Make sure the voltage and wiring match your system’s requirements. Wrong compatibility can cause poor performance or damage.
Smart Features To Consider
Smart thermostats offer features that add convenience and savings. Features include:
- Remote control via smartphone apps
- Learning your schedule for automatic adjustments
- Energy usage reports to track savings
- Voice control with assistants like Alexa or Google
- Geofencing to adjust temperature when you leave or arrive
Choose features that suit your lifestyle and budget. Simple smart options may fit small homes. Advanced features may benefit larger homes or busy families.
Tools And Materials Needed
Installing a home thermostat is a straightforward project if you have the right tools and materials on hand. Gathering everything before you start will save you time and prevent frustration. It also helps you avoid multiple trips to the hardware store, keeping the process smooth and efficient.
Essential Tools
- Screwdriver Set:Both flathead and Phillips screwdrivers are often needed to remove the old thermostat and attach the new one.
- Drill:A cordless drill with drill bits makes mounting easier and quicker, especially if new holes are required.
- Wire Stripper:This tool helps you strip insulation from wires without damaging them—crucial for proper connections.
- Voltage Tester:Ensures the power is off before you touch any wiring, protecting you from electric shock.
- Level:A small bubble level guarantees your thermostat is mounted straight, improving both aesthetics and function.
Safety Equipment
- Insulated Gloves:Protect your hands from sharp wires and accidental electrical contact.
- Safety Glasses:Prevent dust or debris from entering your eyes while drilling or handling wires.
- Mask:Helpful if you’re drilling into walls that may contain dust or insulation particles.
Replacement Parts
Sometimes, the new thermostat package includes all necessary parts. But it’s wise to have a few extras just in case.
- Thermostat Mounting Plate:Some models require a specific mounting bracket to fit your wall.
- Wire Connectors:Also known as wire nuts, these help secure wire connections safely.
- Extra Screws and Anchors:Walls vary in material, so having different sizes and types ensures a solid installation.
- Replacement Batteries:Many smart thermostats need batteries—check the type before starting.
Have you checked your toolkit for these items? Missing even one can turn a simple installation into a frustrating puzzle. Preparing properly puts you in control and helps you finish the job confidently.
Preparing For Installation
Preparing for installation is a crucial phase that sets the stage for a smooth thermostat setup. Taking the right precautions here can save you from unnecessary headaches later on. Let’s dive into the essential tasks you need to complete before installing your new thermostat.
Turning Off Power
Safety is your top priority before touching any electrical components. Locate your home’s circuit breaker panel and turn off the power to your heating and cooling system. Double-check that the power is off by trying to adjust your current thermostat or using a voltage tester if you have one.
Have you ever underestimated this step? It’s easy to forget, but skipping it can lead to shocks or damage. Taking a moment to confirm the power is off protects both you and your equipment.
Removing The Old Thermostat
Start by gently removing the thermostat cover. Most covers snap off easily, but some might require a screwdriver. Once the cover is off, note how the thermostat is mounted—some use screws, others may have clips.
Detach the thermostat from the wall carefully to avoid pulling or damaging the wires. If you feel resistance, check for hidden screws or clips. This careful approach prevents unnecessary repairs and keeps your wiring intact for the next step.
Labeling Wires
Before disconnecting any wires, labeling them is essential. Use small pieces of masking tape or pre-made wire labels to mark each wire according to the terminal it’s connected to. This simple step will save you confusion when connecting your new thermostat.
In my experience, skipping labeling turned a 30-minute job into an hour-long puzzle. Don’t rely on memory—wire colors aren’t always standard, and labeling ensures you reconnect everything correctly. Clear labels help you avoid costly mistakes and make the installation process straightforward.

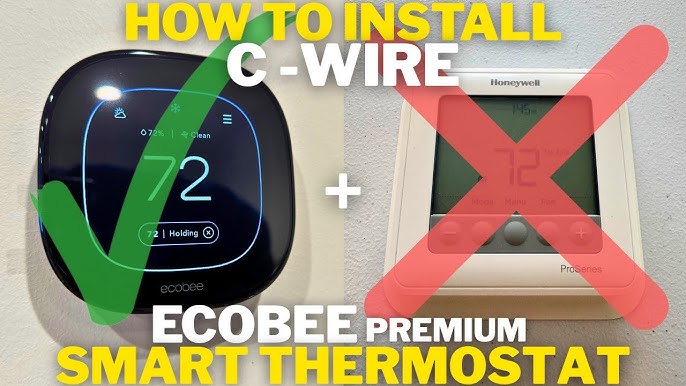
Credit: www.reddit.com
Installing The New Thermostat
Installing the new thermostat is a straightforward process that anyone can handle. It requires careful attention to detail and following safety precautions. The key is to mount the base plate securely, connect the wires correctly, and attach the thermostat unit firmly. This ensures your system works efficiently and lasts longer.
Mounting The Base Plate
Start by choosing the right spot on the wall for the base plate. It should be away from direct sunlight and drafts. Use a level tool to keep the base plate straight. Mark the screw holes with a pencil. Drill holes if needed, then secure the base plate with screws. Make sure it is tight and does not wobble.
Connecting The Wires
Turn off the power to your heating and cooling system. Carefully remove the old thermostat wires from their terminals. Match each wire color to the corresponding terminal on the new base plate. Use the labels from your old thermostat or the instruction manual. Tighten the screws to hold the wires firmly. Double-check each connection for security.
Attaching The Thermostat Unit
Align the thermostat unit with the base plate. Gently press it until it snaps into place. Some models may have screws or clips for extra security. After attaching, turn the power back on. Test the thermostat by adjusting the temperature settings. Confirm the system responds as expected. Your new thermostat is now ready to use.
Configuring The Thermostat Settings
Configuring your thermostat settings is the key to getting the most comfort and efficiency from your heating and cooling system. This process ensures your thermostat operates according to your daily routine and preferences, helping you save energy and maintain the perfect temperature. Let’s break down the essential settings you need to adjust right after installation.
Setting The Date And Time
Start by setting the correct date and time on your thermostat. This step might seem basic, but it’s crucial for the programming to work properly. If your thermostat’s clock is off, your heating or cooling schedules won’t activate at the right moments, causing discomfort or wasted energy.
Most models let you adjust the date and time through simple buttons or a touchscreen interface. Take a moment to double-check the AM/PM settings if your thermostat uses a 12-hour clock. This small detail can affect how your entire schedule runs.
Programming Temperature Schedules
Programming your thermostat allows you to create temperature changes based on your daily habits. Think about when you wake up, leave the house, return, and go to bed. Setting lower temperatures when you’re away or asleep can cut down your energy bills significantly.
Many thermostats offer options to set different schedules for weekdays and weekends. Use this feature to match your lifestyle. For instance, if you work from home on Fridays, program the thermostat to stay comfortable all day rather than lowering the temperature.
- Set morning temperature to a cozy 70°F before waking up
- Lower to 62°F during work hours when no one is home
- Raise to 68°F before you return in the evening
- Reduce again to 64°F during bedtime
Connecting To Wi-fi (if Applicable)
Wi-Fi-enabled thermostats give you control from anywhere using your smartphone or voice assistants. Connecting to your home network is usually straightforward but requires your Wi-Fi name and password.
Once connected, you can adjust settings remotely, receive alerts, and even get energy usage reports. This connection transforms your thermostat from a simple device into a smart companion that adapts to your life.
If you experience connection issues, try moving your router closer or using a Wi-Fi extender. Have you noticed how much easier it is to tweak your home’s temperature when you’re not even there? This convenience alone can change how you think about home comfort.
Testing And Troubleshooting
Testing and troubleshooting ensure your new thermostat works properly. These steps help find problems and fix them quickly. Confirm your heating and cooling systems respond to thermostat changes. Check settings and wiring for smooth operation.
Verifying System Operation
Turn on the thermostat and set a temperature higher than the room’s current level. Listen for the furnace or heater to start. Next, lower the temperature to trigger the air conditioner. Watch the system respond within a few minutes. Check the display screen for error messages. Observe if the fan runs continuously or as programmed.
Common Issues And Fixes
- No power:Check circuit breakers and batteries.
- Incorrect temperature:Calibrate the thermostat or replace faulty sensors.
- Fan won’t turn on:Inspect wiring and fan settings.
- System does not respond:Verify the wiring matches the thermostat’s instructions.
- Display is blank:Replace batteries or check power source.
When To Call A Professional
Contact a technician if the system fails after troubleshooting. Avoid handling electrical components beyond basic checks. Seek help if wiring looks damaged or confusing. Professionals ensure safe and correct thermostat installation. They diagnose complex issues that simple fixes cannot solve.
Maintaining Your Thermostat
Maintaining your thermostat ensures it works efficiently and lasts longer. Regular upkeep prevents unexpected breakdowns and keeps your home comfortable year-round. Simple maintenance tasks can save you money and hassle down the road.
Regular Cleaning Tips
Dust and dirt can accumulate inside your thermostat, affecting its sensors and performance. Gently remove the cover and use a soft brush or compressed air to clean the interior. Avoid using water or cleaning sprays, as moisture can damage the electronics.
Check the display screen regularly for smudges or fingerprints, and wipe it with a dry microfiber cloth. A clean thermostat reacts better to your temperature adjustments, giving you accurate control.
Battery Replacement
If your thermostat runs on batteries, don’t wait for it to stop working before replacing them. Low batteries can cause erratic behavior or loss of settings. Keep a schedule to check and replace batteries every 6 to 12 months.
Use high-quality alkaline batteries for longer life. If your thermostat shows a low battery warning, replace them immediately to avoid interruptions in heating or cooling.
Software Updates
Smart thermostats often receive software updates that improve performance and add new features. Check your thermostat’s app or settings menu regularly for available updates. Installing these updates keeps your device secure and running smoothly.
Updates can fix bugs that cause inaccurate temperature readings or connectivity issues. Have you noticed your thermostat acting strangely? A quick update might be all it needs to get back on track.
Credit: lahvaclc.com
Credit: www.tomsguide.com
Frequently Asked Questions
How Do I Choose The Right Thermostat?
Choosing the right thermostat involves considering your HVAC system, home size, and preferences. Smart thermostats offer advanced features like remote control and learning abilities. Ensure compatibility with your system. Consider your budget and desired features to make an informed decision.
Can I Install A Thermostat Myself?
Yes, you can install a thermostat yourself with basic tools. Turn off power to the HVAC system before starting. Follow the manufacturer’s instructions closely. Most thermostats come with a detailed installation guide. If unsure, consult a professional to avoid potential issues.
What Tools Are Needed For Thermostat Installation?
You will need a screwdriver, wire stripper, and a drill. A level is helpful for accurate placement. These basic tools are generally sufficient for most thermostat installations. Always refer to the installation guide for specific tool requirements related to your thermostat model.
How Long Does Thermostat Installation Take?
Thermostat installation typically takes about 30 minutes to an hour. This depends on your familiarity with the process. Reading the instructions beforehand can expedite the installation. Ensure you have all necessary tools and materials ready before starting to save time.
Conclusion
Installing a home thermostat is a simple way to control your home’s temperature. It saves energy and lowers bills. Follow the steps carefully for a safe setup. Double-check your connections before turning the power back on. Enjoy the comfort of a well-regulated home all year.
Now, you can manage heating and cooling with ease. Small effort, big difference.