
What Tools Do I Need to Tile My Bathroom Floor. Are you ready to transform your bathroom floor but unsure where to start? Knowing the right tools can make all the difference between a smooth, professional finish and a frustrating, messy project.
You don’t need to be an expert to get it right—you just need the right equipment in your hands. Keep reading, and you’ll discover exactly what tools you need to tile your bathroom floor with confidence and ease. By the end, you’ll feel prepared to tackle the job and create a space you’ll love.

Credit: www.youtube.com
Choosing The Right Tiles
Choosing the right tiles for your bathroom floor is more than just picking what looks good. The tiles must stand up to moisture, offer safety, and fit your style. Understanding different tile options helps you make a choice that lasts and looks great.
Tile Types For Bathroom Floors
Not all tiles are built the same, especially for bathrooms. Porcelain and ceramic tiles are popular because they resist water and are easy to clean.
Natural stone tiles like marble and granite add luxury but need sealing to prevent stains. Vinyl tiles offer a budget-friendly option with good water resistance and soft underfoot feel.
Think about how much traffic your bathroom gets and how slippery the tile might be when wet. Have you tested tile samples on your floor to see how they handle moisture?
Size And Shape Considerations
Tile size affects the room’s feel. Large tiles can make small bathrooms look bigger by reducing grout lines. Small tiles offer more grip but require more maintenance.
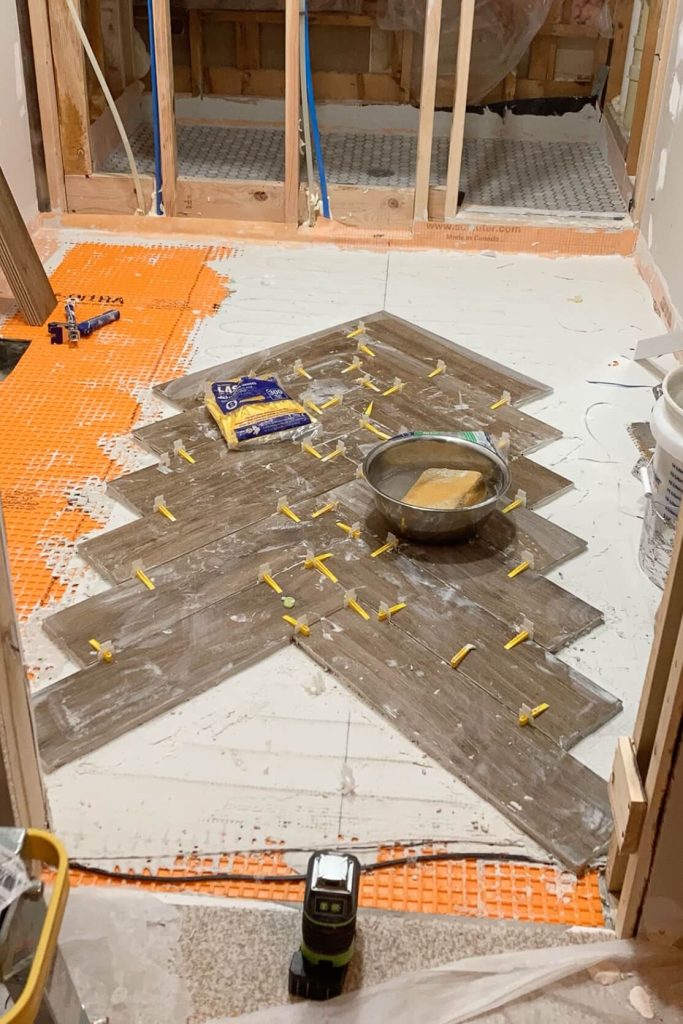
Shapes like squares, rectangles, or hexagons create different visual effects. Rectangular tiles laid in a herringbone pattern can add movement and interest to your floor.
Consider the layout and how complex you want the installation to be. Would a simple grid or a creative pattern suit your skills and style better?
Color And Pattern Options
Light colors brighten a bathroom and make it feel clean and airy. Dark tiles hide dirt better but might make the space feel smaller.
Patterns add personality but can overwhelm if your bathroom is small. Subtle textures or soft patterns offer style without overpowering.
Ask yourself what mood you want your bathroom to have. Should it feel calm and spa-like, or bold and energetic?

Credit: www.familyhandyman.com
Surface Preparation Tools
Preparing the bathroom floor surface is key before tiling. The right tools make this process smooth and effective. Clean, level, and protect the floor for a long-lasting tile job. Use specific tools to get the surface ready for tile installation.
Cleaning Supplies
Cleaning the floor removes dust, dirt, and grease. Use a broom or vacuum to clear loose debris. Mop the floor with a mild detergent and warm water. A scrub brush helps remove stubborn grime. Ensure the floor is dry before moving to the next step.
Leveling And Repair Tools
Uneven floors need leveling for proper tile adhesion. Use a floor leveler compound to fill low spots. A trowel helps spread the compound smoothly. Sandpaper or a sanding block smooth rough patches. Repair cracks with a suitable patching material. Check with a level tool to ensure flatness.
Moisture Barrier Materials
Bathrooms have high moisture levels. Protect the floor with a moisture barrier. Use plastic sheeting or a waterproof membrane. Cut it to fit the floor area. Tape the seams to prevent water penetration. This step prevents mold and damage under the tiles.
Cutting And Measuring Gear
Cutting and measuring gear are essential when tiling your bathroom floor. Precise cuts and accurate measurements ensure your tiles fit perfectly, avoiding gaps and uneven edges. Investing in the right tools saves time and reduces frustration during your project.
Tile Cutter Types
You’ll find several tile cutters, each suited for different tile materials and cutting styles. Manual tile cutters are great for straight cuts on ceramic tiles. They’re affordable, easy to use, and perfect if you’re new to tiling.
For more complex cuts or harder tiles like porcelain, a wet saw is a better choice. It uses water to cool the blade and reduce dust, which helps you make clean, precise cuts without damaging the tile. Have you ever struggled with jagged tile edges? A wet saw can prevent that.
For smaller, detailed cuts, tile nippers come in handy. They allow you to chip away tiny pieces to fit odd shapes or corners. Using the right cutter makes your job smoother and your finished floor look professional.
Measuring Tools
Accurate measuring is the foundation of a neat tile job. A good tape measure is a must-have for measuring the overall floor space and individual tile placement. Look for one with clear markings and a locking feature to keep measurements steady.
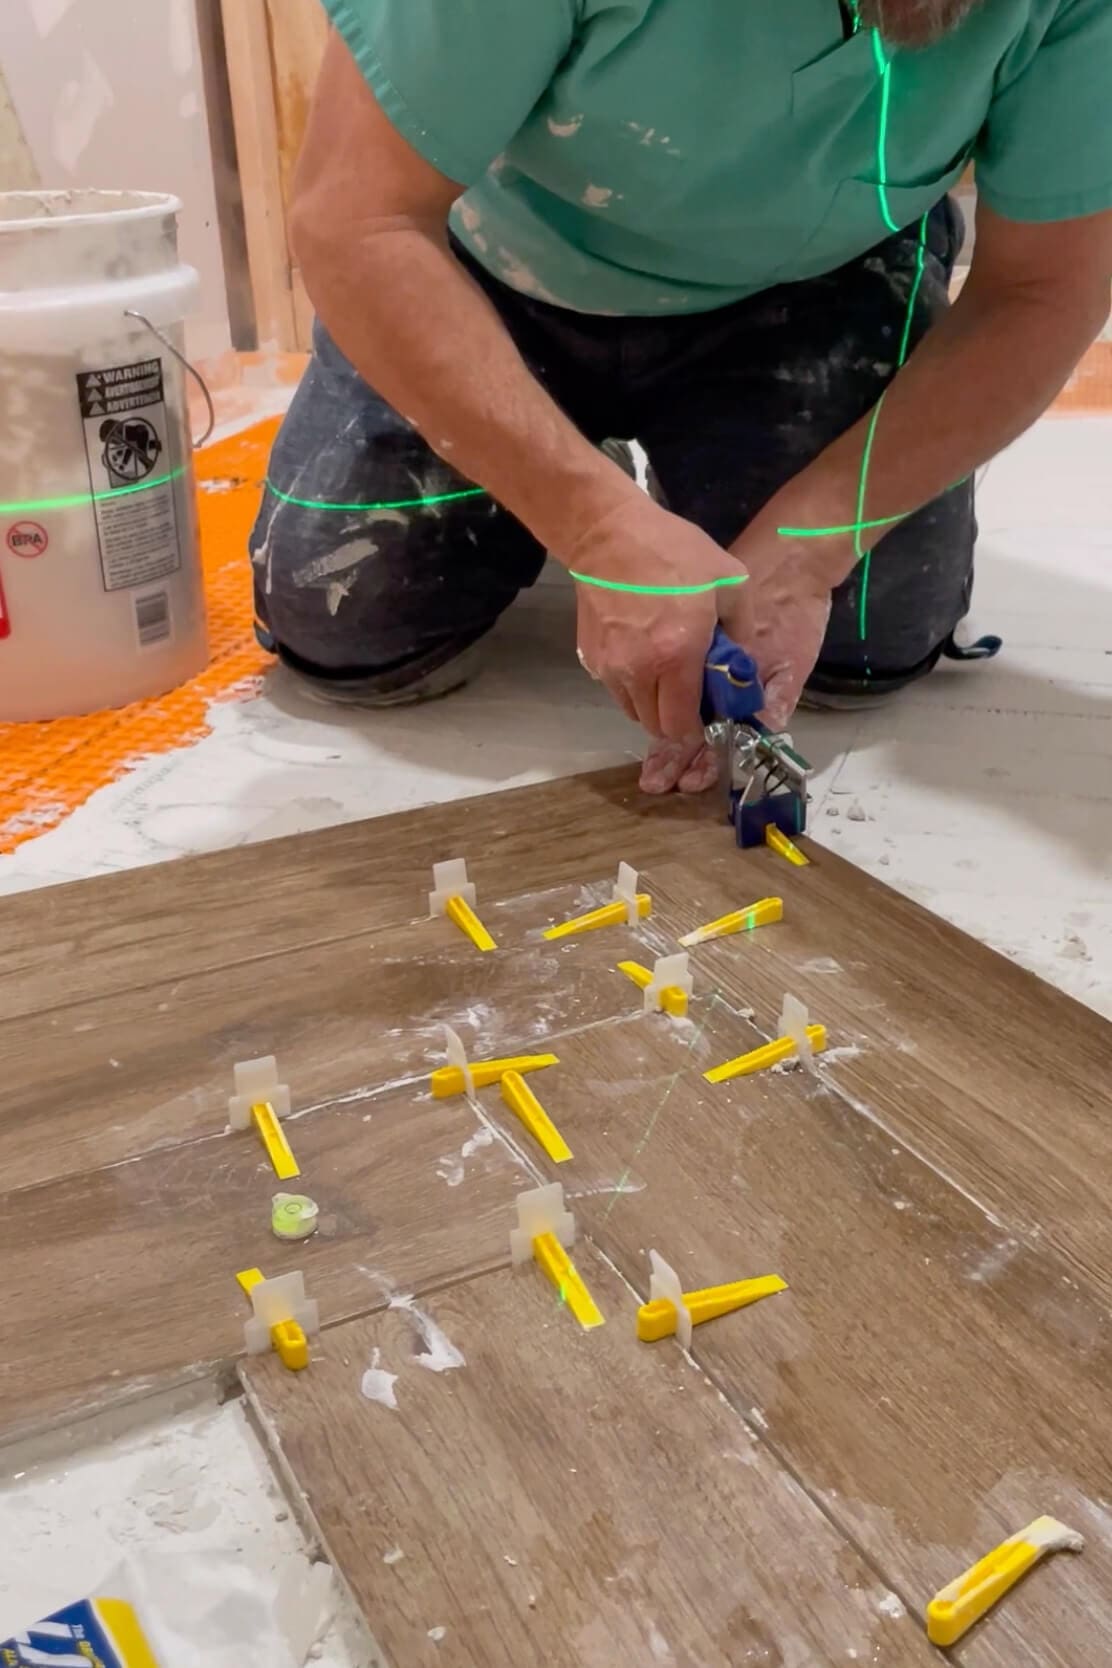
A carpenter’s square helps maintain perfect right angles, which is crucial for laying tiles evenly, especially around corners and edges. Don’t overlook a level either—keeping your tiles flat prevents uneven surfaces that can cause tripping or water pooling.
Have you tried measuring twice and cutting once? It’s advice for a reason. Double-checking measurements with these tools can save you costly mistakes.
Marking Instruments
Marking your tiles before cutting ensures precision. A pencil is the simplest tool, but it can be hard to see on darker tiles. A fine-tip marker or chalk pencil works better on various tile surfaces, leaving clear, visible lines.
Some tilers prefer a scribe tool to score tiles gently, giving a guide for breaking tiles cleanly. Using the right marking instrument reduces guesswork and helps you cut exactly where needed.
Have you ever made a cut that was just a bit off? Marking your tiles carefully will help you avoid that frustration and keep your project on track.
Adhesive And Grouting Equipment
Adhesive and grouting equipment play a vital role in tiling a bathroom floor. These tools help secure tiles firmly and fill gaps for a smooth finish. Using the right equipment ensures the tiles stay in place and look professional. This section covers key tools for applying adhesive and grout effectively.
Choosing The Right Thinset
Thinset mortar is the adhesive that bonds tiles to the floor. Select a thinset suitable for bathroom floors and the tile type. There are different types for ceramic, porcelain, and natural stone tiles. Some thinsets come pre-mixed, while others require mixing powder with water. Choose one with good water resistance for wet areas.
Mixing Tools
Proper mixing of thinset and grout ensures strong adhesion and smooth application. Use a bucket or mixing container for small batches. A drill with a mixing paddle attachment helps blend powders evenly. Stir until the mix is creamy and lump-free. Avoid overmixing to keep the adhesive workable.
Grout Application Tools
Grouting fills the spaces between tiles to prevent water seepage and improve appearance. Use a rubber grout float to spread grout evenly. Hold the float at a 45-degree angle and press grout into joints. A damp sponge helps wipe off excess grout and smooth the surface. Keep water handy for cleaning tools during work.
Installation Accessories
Choosing the right installation accessories is just as important as selecting the tiles themselves. These tools ensure your tiles are laid evenly, firmly, and with a professional finish. Without them, you risk uneven gaps, loose tiles, or damage during installation.
Tile Spacers
Tile spacers help you keep consistent gaps between tiles, which is crucial for grouting later. They come in various sizes, so pick one that matches the grout width you want. Using spacers makes your floor look neat and well-planned.
I once skipped spacers on a small bathroom project, and the uneven gaps made grouting a nightmare. Don’t let this happen to you—always use spacers to save time and frustration.
Notched Trowels
Notched trowels spread adhesive evenly and create grooves that help tiles stick better. The size of the notches depends on your tile size and the type of adhesive you use. Choosing the right trowel can make a big difference in how well your tiles stay in place over time.
If you use a flat trowel or one that’s too small, your tiles might not bond properly, leading to loose spots later. Make sure your trowel matches your tile thickness for the best results.
Rubber Mallets
A rubber mallet is essential for gently tapping tiles into place without cracking them. It helps you adjust the tile height and ensures a tight fit against adjacent tiles. Using a regular hammer would damage your tiles, so invest in a rubber mallet for this job.
I remember using a wooden block and hammer once, which ended with a chipped tile. A rubber mallet gives you control and prevents costly mistakes.
Safety And Cleanup Supplies
Safety and cleanup supplies are essential when tiling your bathroom floor. They protect you from injury and make the post-project mess manageable. Without the right gear, you risk accidents and extended cleanup time.
Protective Gear
Always wear gloves to protect your hands from sharp tile edges and harsh adhesives. Safety goggles shield your eyes from dust and flying debris, especially when cutting tiles. Consider knee pads too—your knees will thank you during those long hours on the floor.
Cleaning Tools
A sturdy broom and dustpan help you quickly sweep away tile dust and small fragments. A wet sponge or mop is necessary to wipe off excess grout before it hardens. Keep a bucket of clean water nearby—it’s your best friend for frequent rinsing to avoid smearing grout or adhesive.
Disposal Containers
Set up a dedicated bin or heavy-duty trash bag for tile scraps and packaging materials. Tiles can be heavy and sharp, so use containers that won’t easily tear or break. Having a spot for debris encourages you to clean as you go, which saves time and effort later.
Credit: crystelmontenegrohome.com
Frequently Asked Questions
What Basic Tools Are Needed For Bathroom Floor Tiling?
You need a tape measure, tile cutter, notched trowel, grout float, and level. These tools ensure precise cuts and even tile placement. A rubber mallet and sponge are also essential for setting and cleaning tiles.
How Do I Choose The Right Tile Cutter?
Select a tile cutter based on tile material and thickness. Manual cutters work well for ceramic tiles, while wet saws handle porcelain or stone. Ensure the cutter provides clean, straight cuts for a professional finish.
Which Adhesive Is Best For Bathroom Floor Tiles?
Use a waterproof, mold-resistant thin-set mortar for bathroom floors. It provides strong bonding and prevents water damage. Always choose an adhesive compatible with your tile type and subfloor material.
Do I Need A Tile Spacers For Bathroom Floors?
Yes, tile spacers keep consistent gaps between tiles for uniform grout lines. They help achieve a neat, professional look and prevent uneven spacing during installation.
Conclusion
Tiling your bathroom floor is a rewarding DIY project. With the right tools, it becomes manageable. A tile cutter, trowel, and spacers are essential. Don’t forget a level for perfect alignment. Safety goggles protect your eyes from debris. A grout float ensures even grout application.
Kneepads make the job comfortable. Gather these tools before you start. A little preparation leads to great results. Your bathroom will look refreshed and stylish. Ready to start your tiling journey? Enjoy the process and the final look.