
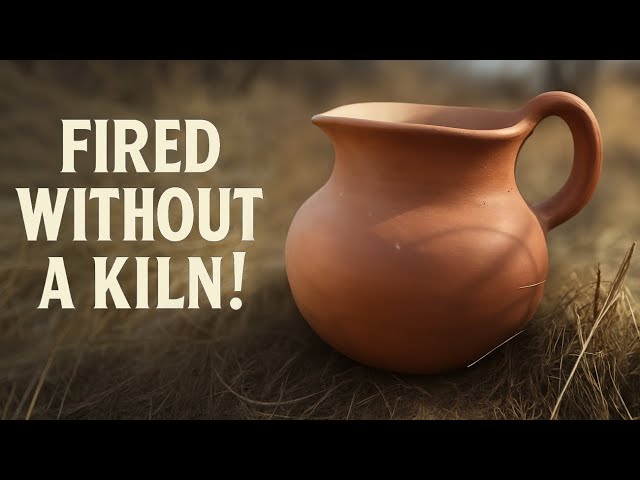
How to Fire Pottery Clay at Home. Have you ever wondered how to turn your pottery clay into beautiful, durable art right at home? Firing pottery clay might sound complicated, but with the right steps, you can do it yourself without expensive equipment.
Imagine holding a finished piece you crafted, strengthened and ready to use or display. In this guide, you’ll discover simple, effective ways to fire your clay safely and successfully. Keep reading, and soon you’ll bring your clay creations to life like a pro.
Choosing The Right Clay
Choosing the right clay is the foundation of successful pottery firing at home. The type of clay you pick affects not only the look and feel of your finished piece but also the firing temperature and technique you’ll need. Understanding your options can save you time, effort, and frustration in your pottery journey.
Types Suitable For Home Firing
Not all clays are created equal, especially when it comes to home kilns or alternative firing methods like pit firing or raku. You want clays that mature at lower temperatures, typically between 1,800°F and 2,200°F (cone 06 to cone 04).
- Earthenware Clay:Perfect for beginners, this clay fires at lower temperatures and is easy to work with. It often produces warm, rustic colors and is ideal if you’re using a small electric kiln.
- Stoneware Clay:A bit more durable and fires at slightly higher temperatures. It’s great if you want a more finished, professional look, but make sure your home kiln can reach the required heat.
- Raku Clay:Specifically designed for raku firing, which involves quick firing and cooling. This clay can handle thermal shock better than others.
Have you thought about the firing method before choosing your clay? Matching clay to your firing setup is crucial for avoiding cracks and explosions during firing.
Clay Preparation Tips
Before you start shaping, preparing your clay properly makes a huge difference. Proper wedging removes air bubbles that cause cracks or explosions in the kiln.
- Wedging:Knead your clay thoroughly to create a uniform texture and remove trapped air. It’s like kneading dough—firm, consistent pressure works best.
- Moisture Control:Keep your clay at the right moisture level. Too wet and it will slump; too dry and it will crack during firing.
- Storage:Store unused clay in airtight containers or plastic bags to maintain moisture. Dry clay is harder to rehydrate and can cause frustration.
Have you ever had a piece crack after firing? Sometimes the cause is as simple as not wedging enough or working with uneven moisture. Taking the time to prepare your clay can prevent costly mistakes and keep your pieces intact.
Essential Tools And Equipment
Firing pottery clay at home requires more than just creativity and patience. Having the right tools and equipment makes the entire process smoother and safer. Knowing what you need helps you avoid costly mistakes and ensures your pieces come out just right.
Home Kiln Options
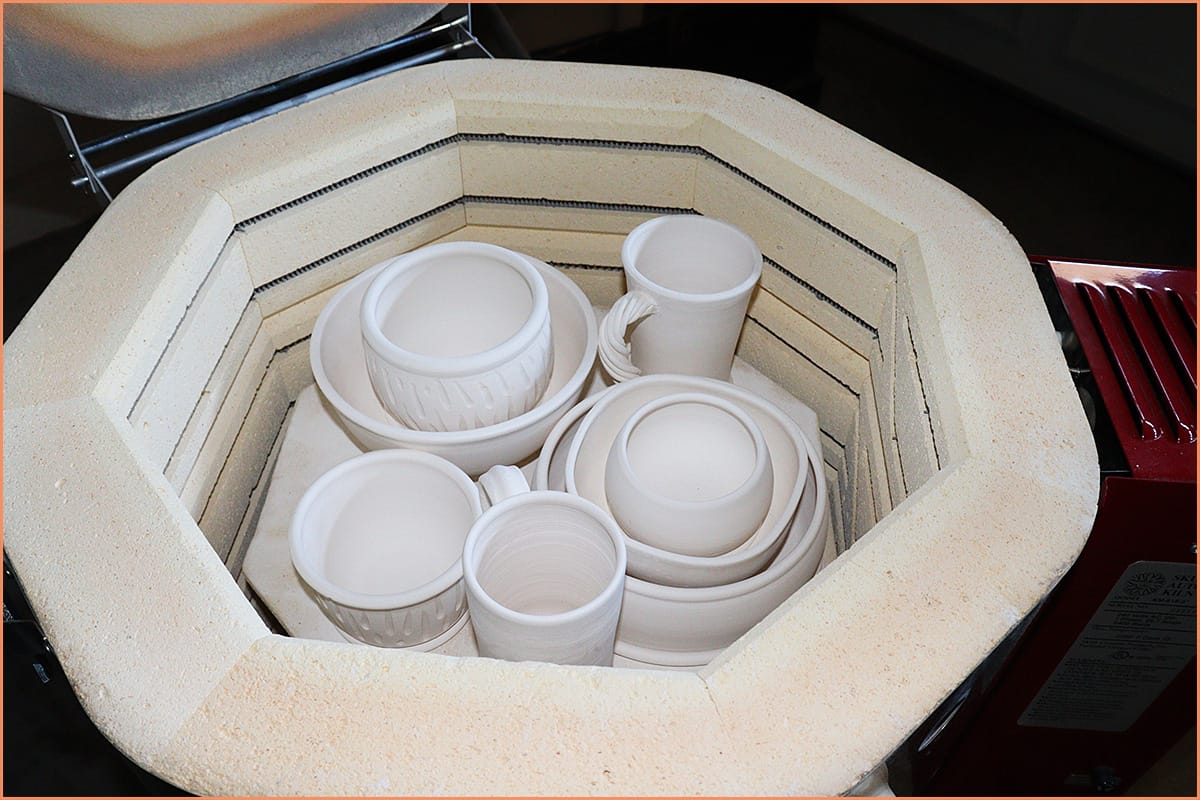
Your kiln is the heart of the firing process. Choosing the right one depends on your space, budget, and how often you plan to fire your pottery.
- Electric Kilns:These are the most popular for home use. They offer precise temperature control and are relatively easy to operate. Models like the Paragon SC-2 are compact and user-friendly.
- Gas Kilns:They provide better atmosphere control for certain clay types but require ventilation and more space. Not ideal if you live in an apartment or small home.
- Raku Kilns:If you want quick firings and unique surface effects, a raku kiln might be your choice. They can be small and portable but require safety precautions due to open flames.
Think about your firing frequency and space before investing. What kind of pottery do you want to create, and how much room can you dedicate to a kiln?
Safety Gear And Accessories
Firing pottery involves high temperatures and potentially harmful fumes. Protecting yourself is not optional—it’s essential.
- Heat-Resistant Gloves:These protect your hands when loading and unloading the kiln. They must withstand temperatures above 500°F.
- Respirator Mask:Some clays and glazes release fumes during firing. A good respirator keeps your lungs safe, especially in poorly ventilated spaces.
- Protective Eyewear:Sparks or hot debris can cause eye injuries. Always wear safety glasses when handling the kiln.
- Kiln Furniture and Shelves:These support your pottery inside the kiln, preventing warping or sticking. Invest in durable kiln shelves and posts.
Have you set up a dedicated, well-ventilated area for firing? Your safety gear and equipment should work together to create a safe firing environment.
Setting Up Your Firing Space
Setting up your firing space is a crucial step when firing pottery clay at home. It not only ensures the safety of your environment but also affects the quality of your final pieces. Taking the time to prepare the right area can save you from unexpected hazards and improve your firing experience.
Safe Location Selection
Choose a spot away from flammable materials like curtains, paper, or wooden furniture. A concrete floor or a garage area works great because it can handle heat and accidental spills.
Think about accessibility too. You want enough room to move around your kiln or firing device safely without bumping into obstacles.
Have you checked if your space can support the weight and heat of your kiln? That’s something many overlook but is essential for safety and stability.
Ventilation And Fire Precautions
Proper ventilation is key to avoid buildup of toxic fumes and excess heat. Open windows or use an exhaust fan to keep fresh air flowing while your kiln runs.
Keep a fire extinguisher nearby and know how to use it before you start firing. It’s better to be prepared than regret it later.
Make sure you have a clear, clutter-free zone around your kiln. Remove any loose fabrics, paper, or flammable liquids to reduce fire risk.

Credit: ancientpottery.how
Preparing Clay Pieces For Firing
Preparing clay pieces for firing is a key step in pottery making. Proper preparation helps your work last longer and look better after firing. This stage requires patience and attention to detail. Careful drying and cleaning reduce the chance of damage. Preventing cracks and warping keeps the shape intact during firing. Focus on these simple yet essential tasks to improve your final results.
Drying And Cleaning
Let clay pieces dry slowly and evenly. Avoid direct sunlight or heat sources. Place them in a cool, dry area with good air flow. Uneven drying causes cracks and weak spots.
Clean your pieces before firing. Remove dust, dirt, and fingerprints with a soft, damp sponge. Avoid harsh scrubbing to keep the surface smooth. Clean surfaces ensure better results in the kiln.
Avoiding Cracks And Warping
Cracks form when clay dries too fast or unevenly. Keep pieces covered with plastic to control moisture loss. Slowly remove plastic as drying progresses.
Support delicate parts during drying to prevent warping. Use soft padding or foam under flat or thin sections. Check pieces regularly for signs of stress or bending.
Score and slip joins well to strengthen connections. Weak joints can crack during firing. Proper preparation reduces risks and improves durability.
Firing Techniques At Home
Firing pottery clay at home requires understanding simple techniques to achieve great results. The firing process changes soft clay into durable pottery. Two main firing stages exist: bisque firing and glaze firing. Each stage needs different temperatures and care. Knowing these techniques helps create strong and beautiful pottery pieces.
Bisque Firing Basics
Bisque firing is the first firing of clay pottery. It removes moisture and hardens the clay. This stage prepares pottery for glazing. Use a small kiln or a homemade pit kiln for bisque firing at home.
- Heat slowly to about 1730°F (945°C).
- Increase temperature gradually to avoid cracks.
- Allow pottery to cool completely before handling.
- Check that clay is bone dry before firing.
This firing makes pottery easier to handle and less fragile. It also opens clay pores for better glaze adhesion.
Glaze Firing Tips
Glaze firing melts the glaze to create a glassy surface. It needs higher temperatures than bisque firing. Control the kiln temperature carefully during glaze firing. Too high heat can cause glaze defects.
- Set kiln to the glaze’s recommended temperature.
- Fire pottery evenly to avoid cracking or warping.
- Cool kiln slowly to prevent glaze crazing.
- Use venting to reduce fumes from glaze materials.
Glaze firing gives pottery its final look and durability. Proper firing improves color, texture, and strength of the pottery.
Temperature Control And Timing
Controlling temperature and timing is key to firing pottery clay at home. The right heat transforms soft clay into hard, durable pottery. Too hot or too fast can crack or ruin your piece. Too cool or too slow means the clay won’t fully harden.
Understanding temperature ranges and watching the firing process closely helps achieve good results. Careful timing ensures the clay reaches full strength without damage.
Recommended Temperature Ranges
Different clays need different firing temperatures. Here are common ranges for home pottery firing:
- Earthenware:1,000°C to 1,150°C (1,832°F to 2,102°F)
- Stoneware:1,200°C to 1,300°C (2,192°F to 2,372°F)
- Porcelain:1,200°C to 1,400°C (2,192°F to 2,552°F)
Check your clay type before firing. Follow the manufacturer’s recommendations for best results.
Monitoring The Firing Process
Keep an eye on your kiln throughout the firing cycle. Use a reliable kiln thermometer or pyrometer.
- Increase heat gradually to avoid cracks.
- Hold the peak temperature for the correct time.
- Cool down slowly to prevent thermal shock.
Write down each firing’s temperature and time. This helps improve results with future firings.
Cooling And Unloading
Cooling and unloading your pottery clay after firing is a delicate process that can make or break your finished piece. Rapid temperature changes can cause cracks or even shattering, so patience is key. Handling your pottery with care right after firing ensures all your hard work shines through without damage.
Safe Cooling Practices
Allow your kiln to cool down naturally by turning off the heat and letting it rest for several hours or even overnight. Avoid opening the kiln door too soon; sudden exposure to cooler air can create thermal shock. Keep the room temperature stable—drafts or air conditioners can cause uneven cooling, which stresses the clay.
Think about how fragile your pottery feels when warm. Would you want to hold it immediately after taking it out of the kiln? Giving it time to cool inside the kiln protects your pieces from accidental damage. If you’re in a hurry, resist the temptation to speed things up; patience here pays off.
Handling Fired Pottery
Once cooled, handle your pottery gently to avoid accidental chips or cracks. Use both hands to lift each piece, especially larger or heavier ones, to distribute the weight evenly. Inspect your pieces for any cracks that might have formed during firing or cooling—sometimes tiny flaws only show after complete cooling.
Storing your fired pottery on soft surfaces like cloth or foam cushions prevents scratches and damage. Have you noticed how even slight bumps can ruin smooth finishes? Protect your investment by creating a safe space for your pottery to rest before glazing or displaying.
Credit: potterycrafters.com
Troubleshooting Common Issues
Firing pottery clay at home can sometimes lead to unexpected problems that test your patience and skills. Troubleshooting these common issues is essential to improve your results and enjoy the process more. Understanding why things go wrong helps you adjust your techniques and avoid repeating the same mistakes.
Cracking And Warping Solutions
Cracks often appear because the clay dries too fast or unevenly. To prevent this, try covering your piece with plastic during drying to slow the process. Also, make sure your clay is wedged properly to remove air bubbles that cause weak spots.
Warping usually happens during firing due to uneven heat or the clay’s thickness. Place your pottery on a flat kiln shelf and avoid stacking pieces too close. Thinner areas of your work can heat and cool faster, so aim for consistent thickness throughout.
If you see cracks after firing, consider adjusting your firing schedule. Slowing down the heating and cooling phases can reduce stress on the clay. Have you noticed your kiln’s temperature spikes? Using a pyrometer can help you monitor and control this better.
Glaze Defects And Fixes
Glaze defects like crawling, pinholes, or blistering can be frustrating. Crawling happens when the glaze shrinks and pulls away from the clay surface. This often occurs if the surface is dusty or oily—make sure your pieces are clean before glazing.
Pinholes appear due to trapped gases escaping during firing. Try applying a thinner coat of glaze or firing at a slightly higher temperature to help bubbles escape smoothly. Blistering, which looks like bubbles under the glaze, can be prevented by slower firing and using well-prepared glaze recipes.
Have you experimented with different glaze application methods? Spraying or dipping often gives a more even coat than brushing. Small changes in glaze thickness can make a big difference in your final look.
Creative Ideas For Home Pottery
Creative ideas can make firing pottery clay at home more exciting and personal. Your projects don’t have to be complicated to look beautiful or meaningful. Adding simple touches or experimenting with small designs can transform your pottery experience.
Simple Projects To Start
Begin with easy shapes like bowls, cups, or small plates. These forms help you practice shaping and firing without feeling overwhelmed. You can also try making coasters or small planters—both useful and fun to create.
Try using cookie cutters or molds to get consistent shapes. This saves time and lets you focus on decorating or glazing. Have you tried shaping clay by hand? It’s surprisingly calming and lets your creativity flow naturally.
Customizing Your Creations
After your pieces are fired, you can add personality through painting, carving, or glazing. Use underglazes to paint simple patterns or your favorite colors before the final firing. Carving designs into the clay before it dries gives a unique texture and feel.
Think about adding small embellishments like handles or stamps. You might even press natural items like leaves into the clay for interesting textures. What personal touches will make your pottery truly yours?

Credit: www.soulceramics.com
Frequently Asked Questions
What Is The Best Clay For Home Firing?
The best clay for home firing is low-fire earthenware clay. It requires lower temperatures and is beginner-friendly. This clay type is ideal for simple home kilns. Ensure your kiln can reach the required temperature for your chosen clay. Always follow clay manufacturer’s instructions for best results.
How Do You Fire Clay Without A Kiln?
You can fire clay without a kiln using a pit firing method. Dig a pit, place your pottery, and cover it with combustible materials. Light the materials and let them burn completely. This method is simple but requires careful monitoring.
Always follow safety precautions when using open fires for clay firing.
Can I Use A Kitchen Oven For Firing Clay?
A kitchen oven is not suitable for firing clay. It doesn’t reach the high temperatures needed for proper firing. Kitchen ovens are best for drying clay projects before firing. For firing, use a kiln or alternative methods like pit firing.
Proper equipment ensures your pottery is durable and well-fired.
How Long Does It Take To Fire Clay?
Firing clay usually takes several hours, depending on the method. Kiln firing can take 8 to 24 hours, including heating and cooling times. Alternative methods like pit firing may vary. Always follow specific instructions for your firing method to ensure the best results for your pottery.
Conclusion
Firing pottery clay at home is simple with the right steps. Start with safety and proper tools to avoid problems. Control the kiln temperature carefully for best results. Watch your pottery closely during the firing process. Practice helps you get better and more confident.
Enjoy creating your own unique ceramic pieces. This skill makes pottery fun and rewarding. Give it a try and see your art come alive.