
Is your kitchen sink sprayer leaking or not working properly? Replacing it might seem tricky, but you can do it yourself with just a few simple steps.
Imagine saving time and money by fixing this common problem on your own. In this guide, you’ll learn exactly how to replace a sprayer on your kitchen sink quickly and easily. Keep reading, and you’ll have your sprayer working like new in no time!

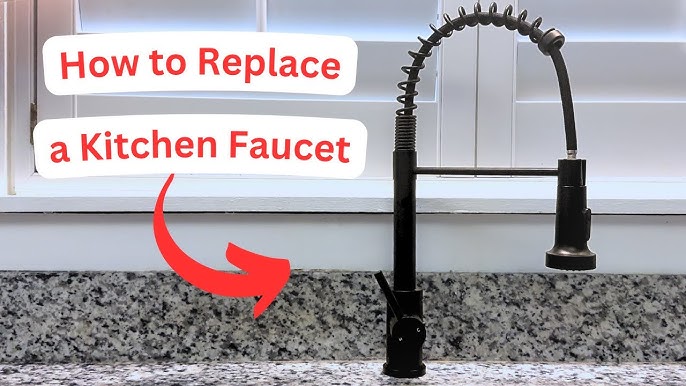
Credit: www.youtube.com
Tools And Materials Needed
Before you start replacing a sprayer on your kitchen sink, gathering the right tools and materials can save you a lot of hassle. Having everything at hand keeps the process smooth and helps you avoid multiple trips to the hardware store. Let’s look at what you’ll need to get the job done efficiently.
Essential Tools For The Job
- Adjustable wrench:This is key for loosening and tightening nuts without damaging them.
- Screwdriver:Usually a Phillips head is required to remove screws securing the sprayer parts.
- Plumber’s tape (Teflon tape):Helps create a watertight seal on threaded connections to prevent leaks.
- Pliers:Useful for gripping and twisting parts that are hard to turn by hand.
- Bucket or bowl:To catch any water that may drip during the process.
Materials You Should Have Ready
- Replacement sprayer kit:Make sure to get one compatible with your sink’s brand and model.
- New sprayer hose:Sometimes it’s better to replace the hose along with the sprayer to avoid future leaks.
- Cleaning cloth:To wipe away water spills and keep your workspace tidy.
Why Preparation Matters
I once started replacing a sprayer and realized halfway through that my wrench was too small. It slowed me down and made the job frustrating. Have you ever been stuck mid-project because you didn’t have the right tool? That experience taught me that preparation is half the work.
Make sure you check your sink’s model and sprayer type before buying materials. This way, you avoid compatibility issues that could turn a quick fix into a long weekend project.

Credit: nrarep.net
Preparing The Sink Area
Preparing the sink area is a crucial first step before replacing your kitchen sink sprayer. Taking a moment to get everything ready can save you frustration and prevent unnecessary messes. Let’s focus on two key actions that will make your task smoother and safer.
Turn Off Water Supply
Before touching any plumbing, you need to shut off the water supply to your sink. This prevents water from spraying everywhere once you disconnect the sprayer hose.
Look under your sink for the shutoff valves. Usually, you’ll find two—one for hot water and one for cold. Turn both valves clockwise until they are tight.
If you don’t have individual shutoff valves, you may need to turn off the main water supply for your home. Have you checked this before starting any kitchen repair?
Clear The Sink Space
Clearing the area around and under your sink gives you room to work comfortably. Remove any cleaning supplies, dishes, or clutter that might get in your way.
Wipe down the sink and countertop so you can spot any leaks or loose parts more easily. A clean workspace helps you stay organized and focused during the replacement.
Have you noticed how much easier small repairs become when the space is tidy? Taking this simple step can reduce stress and speed up your work.
Removing The Old Sprayer
Removing the old sprayer from your kitchen sink can feel tricky at first, but breaking it down into clear steps makes the task manageable. You’ll need to carefully disconnect the water line, unscrew the sprayer hose, and finally take off the sprayer head. These actions prepare your sink for a smooth installation of the new sprayer.
Disconnect The Water Line
Start by turning off the water supply under your sink. This prevents any unexpected leaks while you work. Next, locate the water line connected to the sprayer. Use an adjustable wrench to gently loosen the connection.
Have you noticed how some connectors are tighter than others? Applying steady pressure without forcing it can save you from damaging the fittings.
Unscrew The Sprayer Hose
Once the water line is disconnected, trace the sprayer hose down beneath the sink. The hose usually screws into a fitting on the faucet or the water supply. Unscrew this connection by hand or with pliers if it’s too tight.
Keep a bucket or towel handy to catch any residual water that might spill out. This small step helps avoid a mess and makes cleanup easier.
Remove The Sprayer Head
With the hose free, you can now remove the sprayer head itself. Most sprayer heads twist off by turning counterclockwise. If it’s stuck, a gentle wiggle combined with a firm grip usually does the trick.
Sometimes mineral deposits build up and make the sprayer head stubborn. Soaking it briefly in vinegar can loosen it before removal, saving you time and frustration.
Installing The New Sprayer
Replacing a sprayer on a kitchen sink is a simple task. First, turn off the water supply. Next, disconnect the old sprayer. Attach the new sprayer securely, ensuring all connections are tight. Turn the water back on and check for leaks.
Enjoy your new, functional kitchen sprayer!
Installing a new sprayer on your kitchen sink can seem daunting. But with a little patience, it’s a task you can handle. This guide will help you through each stage of the installation.Attach The Sprayer Hose
Start by threading the sprayer hose through the sink hole. Ensure it’s not tangled or twisted. Connect the hose to the faucet base securely. Hand-tighten it first, then use a wrench for a snug fit. Avoid over-tightening to prevent damage.Secure The Sprayer Head
Attach the sprayer head to the hose end. Make sure it clicks into place. Check that the washer is correctly seated. This ensures a tight, leak-free connection. Test the sprayer head for ease of movement.Connect The Water Line
Locate the water supply under the sink. Connect the sprayer hose to the water line. Use a wrench to ensure a tight connection. Turn on the water supply. Check for leaks at all connections. If leaks occur, tighten connections gently.Testing The New Sprayer
Testing the new sprayer is a crucial step that ensures your kitchen sink works perfectly after replacement. It helps you catch any issues early before they become bigger problems. Taking a few minutes to check everything can save you frustration and extra repairs later.
Turn On Water Supply
Start by turning the water supply back on slowly. This prevents sudden pressure changes that could cause leaks or damage. Pay attention to how the water flows from the faucet and sprayer connection as you open the valves.
Check For Leaks
Look carefully around all joints and connections for any signs of dripping water. Even small leaks can cause damage over time, so don’t overlook them. Use a dry paper towel to detect moisture in tight spaces that might be hard to see.
Verify Sprayer Functionality
Test the sprayer by pressing the trigger and observing the water pressure and spray pattern. Does it reach all the way to the sink edges? Make sure the hose retracts smoothly without sticking or leaking.
Tips For Maintenance
Keeping your kitchen sink sprayer in good shape can save you time and money. Regular maintenance helps avoid leaks and keeps the water flow steady. Here are some practical tips to keep your sprayer working smoothly.
Clean The Sprayer Head Regularly
Mineral buildup can clog the sprayer head and reduce water pressure. Soaking the sprayer in a mixture of vinegar and water removes these deposits effectively. You can also use a soft brush to gently scrub the nozzles for better water flow.
Check For Leaks Around Connections
Leaks often start where the sprayer hose connects to the faucet or under the sink. Inspect these areas regularly to catch drips early. Tightening loose connections or replacing worn washers can prevent water damage and keep your sprayer leak-free.
Replace Worn Out Hoses And Seals
Over time, hoses and seals can crack or become brittle. If your sprayer feels weak or leaks persist, it might be time to swap these parts out. Keeping spare hoses and seals handy lets you fix issues quickly without waiting for replacements.
Test The Sprayer Function Often
Regular use can reveal problems before they become serious. Try running the sprayer weekly to check for changes in pressure or unusual noises. This simple habit helps you spot issues early and avoid surprises during busy kitchen moments.
Use Your Sprayer Gently
Applying too much force or twisting the sprayer hose sharply can damage internal parts. When you pull or push the sprayer, do so smoothly and avoid yanking. Treating your sprayer with care extends its lifespan and keeps it reliable.

Credit: directplumber.sg
Frequently Asked Questions
How Do I Remove The Old Sprayer From My Kitchen Sink?
Turn off the water supply first. Disconnect the sprayer hose under the sink. Unscrew the sprayer head from the hose. Carefully pull out the old sprayer from the sink’s sprayer hole.
What Tools Are Needed To Replace A Kitchen Sink Sprayer?
You will need an adjustable wrench, pliers, and a bucket. A screwdriver may be helpful. Also, have a towel ready to catch water drips.
How Can I Avoid Leaks After Installing A New Sprayer?
Ensure all connections are tight but not over-tightened. Use plumber’s tape on threaded fittings. Check for leaks by turning the water on slowly and observing all joints.
How Long Does It Take To Replace A Kitchen Sink Sprayer?
Replacing a kitchen sink sprayer typically takes 20 to 30 minutes. It depends on your experience and the sink’s design. Preparation and having tools ready speeds up the process.
Conclusion
Replacing a kitchen sink sprayer is easier than you think. Follow each step carefully and take your time. Use the right tools to avoid damage. Test the new sprayer to check for leaks. Fixing it yourself saves money and gives satisfaction.
A working sprayer makes kitchen tasks faster and cleaner. Keep your kitchen sink in good shape with simple repairs. Ready to try it? You can do this!