
How to Paint Wood Kitchen Cabinets. Are your kitchen cabinets looking tired and outdated? You don’t need to spend a fortune on a full remodel to give your kitchen a fresh, new look.
Painting your wood kitchen cabinets is a simple and effective way to transform your space. Imagine opening your cabinets to a smooth, vibrant finish that breathes new life into your kitchen. In this guide, you’ll discover easy steps and expert tips to help you paint your cabinets like a pro—even if you’ve never picked up a paintbrush before.
Ready to boost your home’s style and value with a fresh coat of paint? Keep reading to learn how!
Choosing The Right Paint
Choosing the right paint is a crucial step in transforming your wood kitchen cabinets. The paint you select affects not only the look but also the durability and ease of cleaning. Understanding the types, colors, and finishes will help you make a choice that fits your style and kitchen needs perfectly.
Types Of Paint For Cabinets
Not all paints are created equal, especially for kitchen cabinets that face daily wear and tear. You want a paint that sticks well to wood, resists stains, and cleans easily.
- Latex Paint:Easy to clean and fast drying, latex paint is popular for its low odor and water cleanup. It works well if you prefer a flexible finish that resists cracking.
- Oil-Based Paint:Offers a smooth, durable finish but takes longer to dry and requires mineral spirits for cleanup. It’s excellent for cabinets that need extra toughness.
- Chalk Paint:Great for a matte, vintage look and requires less prep work. However, it may need a protective wax or topcoat for kitchen use.
Think about how much time you can spend painting and maintaining your cabinets. Would you rather have a quick-dry option or a tougher finish that lasts longer?
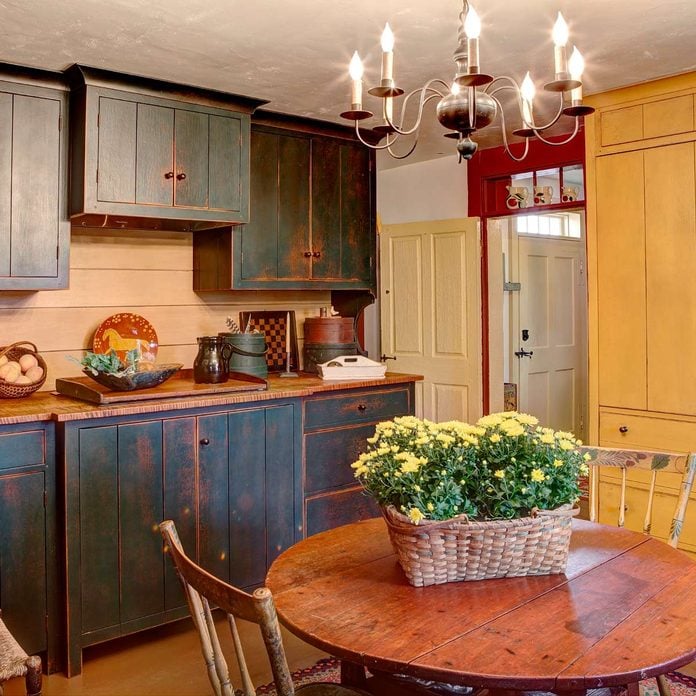
Selecting The Perfect Color
Color changes the entire mood of your kitchen. Do you want it bright and airy or cozy and warm? Your choice can even affect how spacious the kitchen feels.
Neutral colors like whites, creams, and grays are timeless and blend well with most décor styles. On the other hand, bolder colors like navy blue or forest green can add personality and make your cabinets a focal point.
Consider your kitchen lighting before picking a shade. Natural light shows true color, while artificial light can shift hues dramatically. Are you ready to test samples on your cabinets before committing?
Paint Finishes Explained
The finish you choose impacts the cabinet’s look and how easy it is to clean. Some finishes highlight imperfections, while others hide them.
| Finish | Look | Durability | Best For |
|---|---|---|---|
| Matte | Flat, no shine | Less durable, shows stains | Vintage or rustic kitchens |
| Eggshell | Soft sheen | Moderate durability | Most kitchens with moderate use |
| Satin | Subtle shine | Durable and easy to clean | High-traffic kitchen cabinets |
| Semi-gloss | Shiny and reflective | Highly durable and washable | Kitchens that need frequent cleaning |
Would you rather have a finish that hides marks or one that’s easier to wipe clean? Your lifestyle and kitchen use will guide this decision more than trends.
Gathering Essential Supplies
Gathering the right supplies makes painting wood kitchen cabinets easier and more effective. Having everything ready avoids interruptions during the project. It also ensures a smooth, professional finish that lasts longer.
Tools You’ll Need
Prepare these tools before starting to paint your cabinets:
- Sandpaper or sanding block (medium and fine grit)
- Putty knife for filling holes
- Cleaning cloths or tack cloth
- Painter’s tape to protect edges
- Drop cloth or plastic sheeting for floor protection
- High-quality paintbrushes (angled brushes for detail)
- Foam rollers for smooth surfaces
- Primer suitable for wood
- Paint designed for cabinets or wood surfaces
- Screwdriver to remove cabinet doors and hardware
- Paint tray
Preparing Your Workspace
Choose a well-ventilated area with good lighting. Remove all items from cabinets and clear nearby surfaces. Lay down drop cloths or plastic sheets to protect floors and counters. Use painter’s tape to cover edges, walls, and appliances near the cabinets. Organize your tools and supplies within easy reach. This setup helps keep the workspace clean and safe.
Preparing Cabinets For Painting
Preparing your wood kitchen cabinets for painting is the foundation of a successful makeover. Skipping or rushing this phase can lead to paint peeling or uneven finishes. Taking your time to properly prep ensures your cabinets look fresh and last longer.
Removing Hardware And Doors
Start by carefully removing all cabinet doors, drawers, and hardware such as knobs and hinges. Use a screwdriver to avoid stripping screws or damaging the wood.
Label each piece with painter’s tape or a marker to keep track of where everything belongs. This simple step saves you a lot of hassle during reassembly. Have you ever tried to match random pieces after a project? Avoid that frustration now.
Cleaning And Degreasing
Cabinet surfaces often hold built-up grease and grime, especially near cooking areas. Cleaning with warm soapy water won’t cut it alone—you need a strong degreaser.
Use a mixture of trisodium phosphate (TSP) and water or a commercial degreaser. Scrub with a sponge or cloth and rinse thoroughly. Clean surfaces let the paint stick better and prevent peeling later.
Sanding Techniques
Sanding creates a rough texture for the paint to grip. Use medium-grit sandpaper (around 120-150 grit) on all surfaces, focusing on glossy or sealed areas.
Don’t sand too hard; your goal is to dull the finish, not gouge the wood. After sanding, wipe away dust with a tack cloth or damp rag. Have you noticed how smooth surfaces can cause paint to flake off? That’s exactly what sanding helps you avoid.
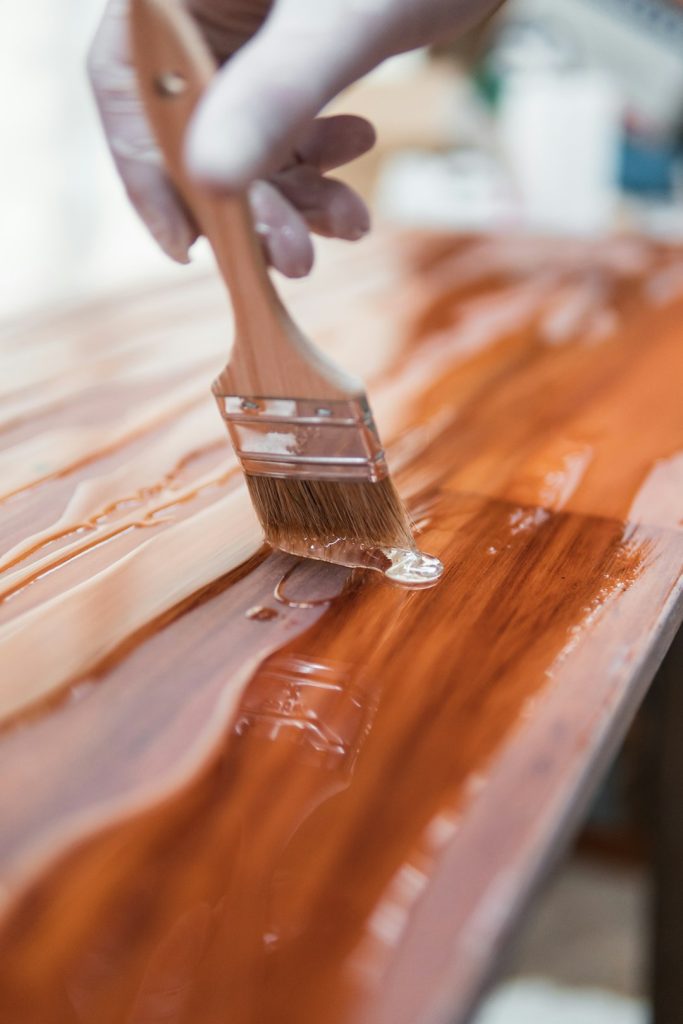
Credit: www.familyhandyman.com
Priming Cabinets
Priming cabinets is a vital step before painting wood kitchen cabinets. It helps paint stick better and lasts longer. Priming also hides stains and prepares the surface for a smooth finish.
Skipping primer can cause peeling and uneven color. Proper priming ensures a professional look and protects the wood underneath.
Choosing The Right Primer
Select a primer made for wood surfaces. Oil-based primers work well for old cabinets with stains or knots. Latex primers dry faster and clean up with water. Choose a stain-blocking primer for cabinets with marks or tannin bleed.
Check if the primer is compatible with your paint type. Some primers work best with oil paints, others with latex paints. This prevents peeling and cracking later.
Applying Primer Correctly
Start with clean, dry cabinets. Sand the surface lightly to remove gloss. Use a high-quality brush or foam roller for smooth application. Apply thin, even coats without drips or thick spots.
Cover all edges and corners well. Avoid heavy layers to prevent drips. Light sanding between coats improves adhesion and smoothness. Wipe dust off before the next coat.
Drying Time Tips
Follow the primer’s label for drying times. Most primers need at least 1 to 4 hours to dry. Longer drying times increase durability. Avoid rushing the process to prevent peeling paint.
Keep the room well-ventilated to speed drying. Avoid painting in very cold or humid conditions. Test dryness by touching a small area gently before painting.
Painting Process
Painting wood kitchen cabinets requires patience and the right technique. The painting process affects the final look and durability. Proper preparation leads to smooth, even coverage. Choosing the right painting method and applying paint correctly helps avoid common problems. This section explains key steps to achieve a professional finish on your cabinets.
Brush Vs. Spray Painting
Brush painting is simple and affordable. It works well for detailed areas and edges. Use a high-quality brush to reduce streaks and brush marks. Brush painting takes more time and needs steady strokes.
Spray painting covers large surfaces quickly. It creates a smooth, even coat with no brush marks. Use a spray gun in a well-ventilated area. Protect surrounding surfaces from overspray with drop cloths or tape. Spray painting needs practice for best results.
Applying Paint In Thin Coats
Thin coats dry faster and look smoother. Thick coats cause drips and uneven texture. Apply light layers of paint, allowing each to dry fully. Multiple thin coats build solid color and durability. Patience pays off with a better finish and fewer problems.
Avoiding Drips And Streaks
Drips happen when paint is too thick or applied heavily. Use a brush or spray with controlled pressure. Keep your strokes even and steady. Stop painting before edges pool with paint. Check cabinets for drips and smooth them immediately. Sand lightly between coats to remove imperfections.
Finishing Touches
Smooth the cabinet surfaces with fine sandpaper for a flawless finish. Apply a clear topcoat to protect paint and add shine. Allow cabinets to dry fully before use to ensure lasting results.
Finishing touches are the cherry on top of your kitchen cabinet painting project. It’s the stage where all your hard work comes together, transforming those once-dull cabinets into stunning showpieces. This final phase can make or break your efforts, so attention to detail is crucial.
Reattaching Hardware And Doors
Once your cabinets are fully painted and dried, it’s time to reattach the hardware and doors. Ensure each piece is clean and shiny before reinstalling. This is your chance to upgrade knobs and handles for a fresh look. Use a screwdriver to carefully attach each hinge and knob. Ensure they are aligned perfectly to prevent any crooked doors. Ever tried opening a cabinet only for the door to catch? Proper alignment saves you that hassle.
Adding Protective Sealer
A protective sealer is essential for maintaining the vibrancy of your paint job. Choose a sealer that suits the type of paint you used. Polyurethane or a clear acrylic sealer often works best for kitchen cabinets. Apply the sealer in thin, even coats. Multiple layers offer better protection against moisture and scratches. Have you ever spilled a drink or splattered oil while cooking? A good sealer helps keep those accidents from ruining your hard work.
Curing And Maintenance Tips
Curing is the unsung hero of a lasting paint job. Allow your cabinets to cure for at least a week before heavy use. This ensures the paint and sealer bond fully. Regular maintenance is simple but vital. Wipe cabinets with a soft cloth and mild detergent to keep them looking new. Consider the last time you deep-cleaned your kitchen; consistent care prevents build-up and keeps your cabinets gleaming. By focusing on these finishing touches, your kitchen cabinets won’t just look good—they’ll last. Are you ready to enjoy your refreshed kitchen space with cabinets that shine with both beauty and durability?
Common Mistakes To Avoid
Skipping proper sanding leads to paint peeling quickly. Using the wrong paint type can cause uneven finishes. Rushing drying time may result in sticky or blotchy surfaces.
Painting your wood kitchen cabinets can breathe new life into your kitchen space. However, it’s easy to make mistakes that could derail your project. Avoiding these common pitfalls can save you time, money, and frustration. Let’s explore some mistakes you should steer clear of to ensure a smooth and successful cabinet transformation.
Skipping Preparation Steps
Preparation is crucial in any painting project. Skipping steps like cleaning, sanding, and priming can lead to poor paint adhesion and an uneven finish. Imagine spending hours painting only to have your hard work peel away within weeks. Before you even think about opening that paint can, ensure your cabinets are spotless. Grease and grime can cause serious adhesion issues. A quick scrub with a degreaser can make all the difference. Sanding may seem tedious, but it’s essential. It helps the paint grip the wood and creates a smooth surface. Trust me, taking the time to sand will pay off with a professional-looking finish.
Using The Wrong Paint Type
Not all paints are created equal. Using the wrong type of paint can result in a finish that chips easily or doesn’t withstand kitchen conditions. You wouldn’t want to redo your cabinets after just a few months, right? Opt for a high-quality paint designed for cabinetry. These paints are formulated to handle the heat, humidity, and frequent cleaning that kitchens endure. Check the paint’s label for terms like “durable” and “scrubbable.” These features are key for long-lasting beauty in your kitchen.
Rushing The Drying Process
Patience is key when painting cabinets. Rushing the drying process can lead to smudges, streaks, and an uneven finish. Have you ever touched wet paint, thinking it was dry? It’s not a pleasant discovery. Allow ample drying time between coats. This ensures each layer adheres properly and creates a smooth surface. Resist the urge to reassemble your kitchen too soon. Giving the paint time to cure fully will enhance its durability and appearance.

Credit: food52.com

Credit: www.youtube.com
Frequently Asked Questions
How Do I Prepare Wood Cabinets Before Painting?
Start by removing cabinet doors and hardware. Clean surfaces with a degreaser. Sand lightly to remove old finish. Wipe off dust with a damp cloth. Proper prep ensures smooth, lasting paint adhesion.
What Type Of Paint Is Best For Kitchen Cabinets?
Use a high-quality acrylic latex or enamel paint. These paints resist moisture, stains, and wear. Satin or semi-gloss finishes offer durability and easy cleaning. Avoid flat or matte paints as they can stain easily.
How Many Coats Of Paint Should I Apply?
Apply two to three thin coats for the best results. Allow each coat to dry completely before applying the next. Thin coats prevent drips and create a smooth, even finish. Patience improves durability and appearance.
Can I Paint Cabinets Without Sanding?
Light sanding is recommended for proper paint adhesion. However, if using a bonding primer, sanding can be minimal. Skipping sanding may cause paint to peel or chip. Always test a small area first.
Conclusion
Painting wood kitchen cabinets can refresh your entire space. Preparation is key to a smooth finish. Take time to clean, sand, and prime carefully. Use the right paint and tools for best results. Patience during drying ensures a lasting look.
Small steps lead to big changes. Enjoy your new, brighter kitchen without a full remodel. This project saves money and adds personal style. Give it a try and see the difference yourself.