
Imagine experiencing a spa-like facial treatment right in the comfort of your own home, without spending a fortune or even using clay. Sounds intriguing, right?
If you’re looking to rejuvenate your skin naturally and affordably, then you’re in the right place. In this guide, you’ll discover how to make a mud mask at home without clay, using simple ingredients you likely already have in your kitchen.
This DIY beauty hack not only promises to refresh your skin but also allows you to enjoy some well-deserved self-care time. Ready to explore the secret to glowing skin without the mess of clay? Let’s dive in and unlock the potential of your pantry!

Credit: biteofdelight.net
Benefits Of Mud Masks
Mud masks offer many benefits for your skin. They help clean, nourish, and improve the skin’s look. Even without clay, homemade mud masks can work wonders. These masks draw out dirt and impurities, making your skin feel fresh and healthy. Regular use can lead to clearer, softer skin. Below are some key benefits of using mud masks.
Skin Detoxification
Mud masks pull out toxins from deep inside your skin. They clear clogged pores and remove dirt. This helps reduce acne and blackheads. The mask acts like a natural cleanser. It leaves your skin feeling clean and refreshed.
Nourishment And Hydration
Mud masks contain minerals that feed your skin. They provide vitamins and nutrients your skin needs. These masks also help keep your skin moist. Hydrated skin looks healthy and glows naturally. Your skin feels soft instead of dry or rough.
Improved Skin Texture
Using mud masks regularly smooths your skin’s surface. They remove dead skin cells gently. This reveals fresh, new skin underneath. Your skin looks even and feels soft to touch. Fine lines and rough patches become less visible.
Ingredients For Clay-free Mud Mask
Choosing the right ingredients shapes the quality of a clay-free mud mask. Each component plays a role in cleansing, nourishing, and soothing the skin. Natural and simple items from your kitchen or garden can work well.
These ingredients provide the texture and benefits usually expected from clay-based masks. They help to absorb oil, remove dirt, and leave skin feeling fresh. Combining them wisely creates a mask that suits various skin types and needs.
Natural Alternatives To Clay
- Oatmeal:Gentle exfoliant and soothes irritated skin.
- Bentonite-free mud:Natural dirt or earth with mineral content.
- Activated charcoal:Draws out impurities and excess oil.
- Fuller’s earth (Multani mitti):Traditional, but check for clay content if avoiding clay completely.
- Rice flour:Absorbs oil and softens the skin.
- Cornstarch:Adds smooth texture and helps absorb moisture.
Additional Skin-boosting Components
- Aloe vera gel:Hydrates and calms sensitive skin.
- Honey:Natural antibacterial and moisturizer.
- Yogurt:Contains lactic acid for gentle exfoliation.
- Essential oils:Such as tea tree or lavender for extra care.
- Green tea:Rich in antioxidants to protect skin.
- Turmeric powder:Brightens and reduces inflammation.
Step-by-step Recipe
Creating a mud mask at home without clay might sound tricky, but it’s easier than you think. This step-by-step recipe breaks down the process into simple parts. You’ll see how to prepare a nourishing base, add the right ingredients, and get the perfect consistency for your skin type.
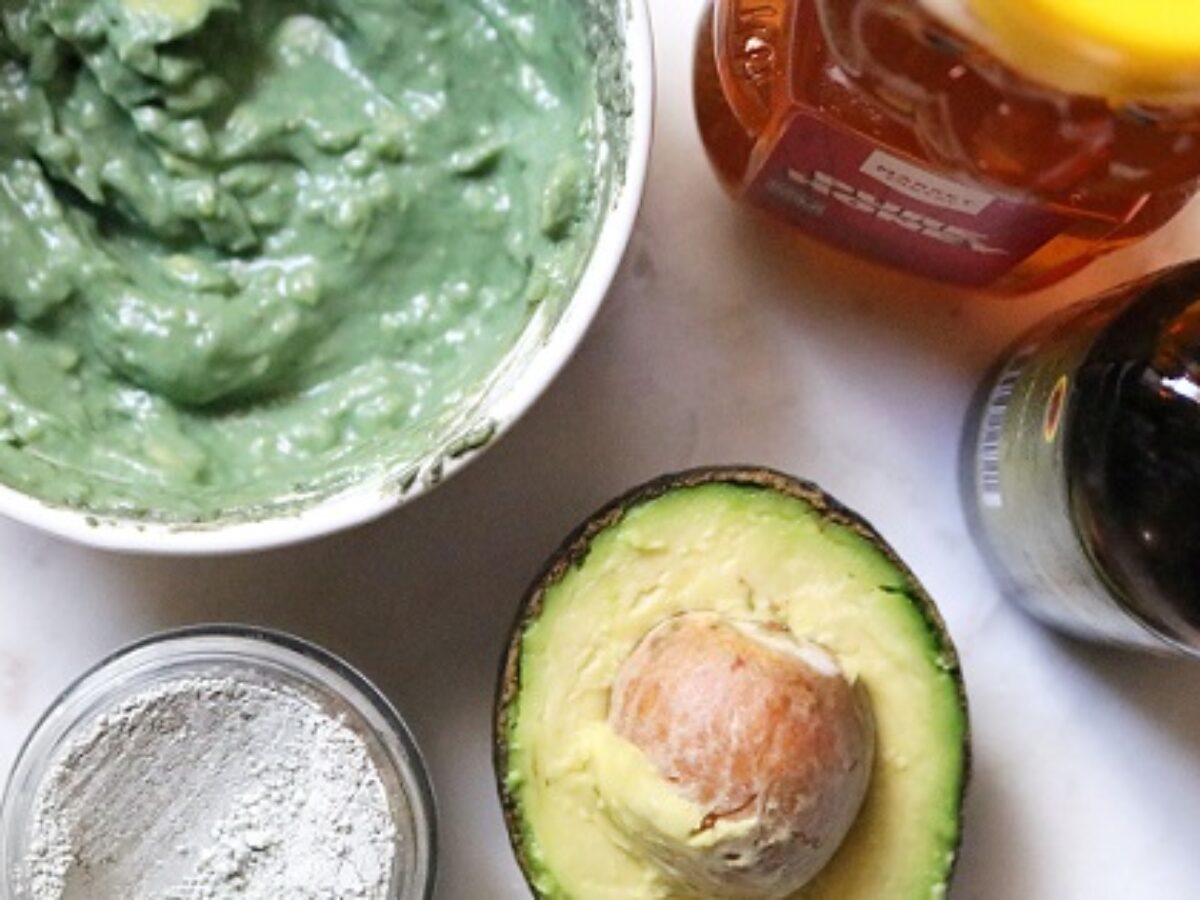
Preparing The Base Mixture
Start with a smooth base that can hold all your ingredients together. Natural options like oatmeal, yogurt, or mashed avocado work great. Each offers unique benefits: oatmeal soothes, yogurt adds moisture, and avocado nourishes deeply.
Choose one that fits your skin’s needs and scoop about two tablespoons into a small bowl. If you want a bit of extra hydration, add a teaspoon of honey or aloe vera gel. These natural moisturizers keep your skin soft while the mask dries.
Adding Essential Ingredients
Next, think about what your skin needs most. Activated charcoal can help detoxify, while turmeric fights inflammation. You can also add a few drops of tea tree oil if you’re dealing with breakouts.
Start with small amounts—like half a teaspoon of powdered ingredients or two to three drops of essential oils. You can always add more, but it’s harder to fix a mask that’s too strong or thick. Mixing these into your base will boost your mask’s power without clay.
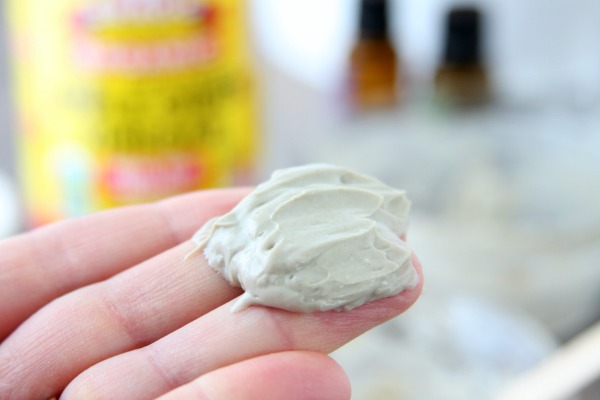
Mixing And Consistency Tips
Mix everything slowly using a small spoon or spatula. You want a smooth paste that’s thick enough to stay on your face without dripping. If it feels too runny, add a bit more oatmeal or mashed avocado.
On the other hand, if it’s too stiff, splash in a little water or more yogurt. Getting this balance right makes the mask easy to apply and comfortable to wear. Have you ever tried a mask that slid off your face? Avoid that by checking the texture before you start.

Credit: www.amazon.com
Application Tips
Applying a mud mask without clay needs care to get the best results. Proper application helps the mask work well on your skin. Follow these tips to make your home mud mask experience smooth and effective.
How To Apply Evenly
Start with a clean, dry face. Use your fingers or a brush to spread the mask. Apply a thin, even layer to avoid patches. Cover all areas except eyes and lips. Use gentle, upward strokes for smooth application. Check in the mirror to find any missed spots.
Ideal Duration For Mask
Leave the mask on for 10 to 15 minutes. Avoid letting it dry completely hard. A slightly damp mask works better for your skin. Overwearing can cause dryness or irritation. Listen to your skin and remove if it feels tight or itchy.
Rinsing And Aftercare
Rinse off with lukewarm water using soft circular motions. Avoid hot water as it may dry your skin. Pat your face dry with a clean towel. Follow with a gentle moisturizer to keep skin soft. Apply sunscreen if you go outside after the mask.
Customizing Your Mask
Customizing your mud mask helps target your skin’s unique needs. Each skin type reacts differently to ingredients. Adjusting your mask ensures better results and a gentle touch. Use natural ingredients that support your skin without harsh chemicals.
For Oily Skin
Choose ingredients that absorb excess oil and control shine. Use honey to soothe and balance oil production. Add a little lemon juice for its natural astringent properties. Green tea powder works well to reduce inflammation and fight bacteria. Mix these with a base like yogurt or aloe vera gel for a smooth mask.
For Dry Skin
Pick moisturizing ingredients that hydrate and soften skin. Avocado offers rich oils and vitamins for deep nourishment. Use a spoonful of honey to lock in moisture. Add a small amount of olive oil or coconut oil for extra hydration. Combine with mashed banana or yogurt to create a creamy texture that feels gentle.
For Sensitive Skin
Focus on calming and soothing ingredients to avoid irritation. Oatmeal is perfect for reducing redness and calming itchiness. Mix with plain yogurt to add gentle moisture. A little aloe vera gel helps soothe and heal sensitive areas. Avoid strong scents or acidic ingredients to keep your skin calm and happy.
Precautions And Storage
Making a mud mask at home without clay can be a fun and rewarding experience, but it’s important to take certain precautions and understand how to store your mask properly. This ensures your skin stays safe and the mask remains effective for future use. Let’s dive into some key points about allergy testing, safe storage, and the shelf life of your homemade mask.
Allergy Testing
Before applying your mask to your entire face, test it on a small patch of skin, like the inside of your wrist or behind your ear. This quick check helps avoid unexpected reactions such as redness, itching, or irritation.
If you notice any discomfort within 24 hours, don’t use the mask on your face. You might want to try a different ingredient or reduce the quantities if you still want to proceed.
Have you ever tried a new skincare product only to regret it later? Allergy testing can save you from that hassle.
Storing The Mask Safely
Store your mud mask in a clean, airtight container to prevent contamination and drying out. Glass jars with tight lids work best because they don’t react with natural ingredients.
Keep the container in a cool, dark place like a bathroom cabinet or refrigerator. Heat and sunlight can break down the mask’s nutrients and reduce its effectiveness.
Make sure to use a clean spoon or spatula to scoop out the mask each time—using fingers can introduce bacteria that spoil the mixture faster.
Shelf Life
Homemade masks without preservatives generally last between 3 to 7 days, depending on the ingredients used. For example, masks with fresh fruit or dairy should be used sooner than those with honey or oils.
Check the mask for any changes in smell, texture, or color before each use. If it smells sour or looks moldy, it’s time to toss it out.
Would you rather make small batches more often or risk using an old mask that might harm your skin?
Credit: www.ogleschool.edu
Frequently Asked Questions
What Ingredients Replace Clay In A Homemade Mud Mask?
You can use natural ingredients like oatmeal, activated charcoal, or bentonite alternatives. These provide cleansing and exfoliating effects without traditional clay.
How Do I Make A Mud Mask Without Clay?
Mix natural powders such as oatmeal or activated charcoal with water or aloe vera gel. Apply the paste, leave it on for 10-15 minutes, then rinse.
Can Mud Masks Without Clay Improve Skin Texture?
Yes, they can help remove impurities and exfoliate dead skin cells. This leads to smoother, clearer skin without the drying effects of clay.
Are Mud Masks Without Clay Safe For Sensitive Skin?
Generally, yes. Choose gentle ingredients like oatmeal or honey. Always do a patch test to avoid irritation or allergic reactions.
Conclusion
Making a mud mask at home without clay is simple and affordable. You can use natural ingredients from your kitchen. This method saves money and avoids harsh chemicals. It also lets you control what goes on your skin. Try different recipes to find what works best.
Your skin will feel fresh and clean. Enjoy the process and take care of yourself naturally. Easy, gentle, and effective—perfect for healthy skin.