
Are you ready to give your kitchen a sleek, modern upgrade? Installing an undermount kitchen sink can completely change the look and feel of your space.
But if you’re worried it might be too complicated or expensive, don’t be. With the right steps and tools, you can do it yourself and save money. This guide will walk you through every part of the process, making it easy to follow—even if you’ve never installed a sink before.
Keep reading, and soon you’ll have a clean, stylish kitchen sink that’s both functional and stunning.
Tools And Materials Needed
Getting your tools and materials ready is the first key step before installing an undermount kitchen sink. Having everything on hand saves you frustration and keeps your project moving smoothly. Missing one essential tool or material can slow you down or even cause damage.
Think about the last time you started a project without checking your supplies. Did you have to stop and run to the store? Avoid that hassle by preparing well in advance.
Essential Tools For Installing An Undermount Kitchen Sink
- Adjustable wrench:Perfect for tightening plumbing connections without stripping nuts.
- Drill with bits:Needed to make precise holes for mounting brackets or screws.
- Caulking gun:Applies sealant smoothly to ensure a water-tight fit.
- Jigsaw or hole saw:If countertop modifications are necessary, these tools help cut clean openings.
- Measuring tape:Crucial for accurate sink placement and alignment.
- Level:Ensures your sink is perfectly horizontal to avoid water pooling.
- Clamps:Hold the sink securely in place while you fasten it.
- Screwdriver set:Different screw heads require different screwdrivers for proper fastening.
Materials You’ll Need
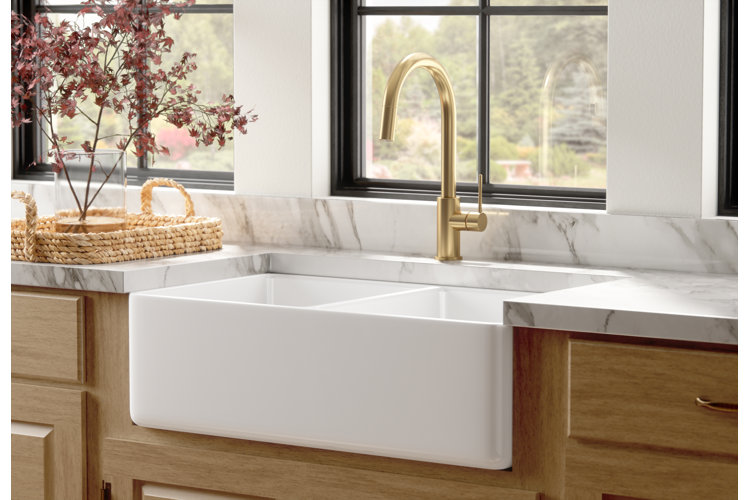
- Undermount kitchen sink:Choose one that fits your countertop cutout and matches your kitchen style.
- Mounting brackets:These secure the sink firmly beneath the countertop.
- Silicone sealant:A high-quality, waterproof sealant keeps water from leaking under the sink.
- Plumber’s putty or gasket:Used to create a watertight seal around drain openings.
- Supply lines and drain pipes:Ensure compatibility with your sink model and existing plumbing.
- Teflon tape:Wraps around threaded plumbing connections to prevent leaks.
Why Proper Preparation Matters
Imagine trying to install your sink and realizing halfway that you don’t have the right sealant or brackets. It’s not just inconvenient—it can lead to leaks and damage down the line.
Proper tools and materials give you confidence and control. They help you avoid common mistakes like poor sealing or unstable mounting.
Do you have everything ready before starting your sink installation? Taking a moment to inventory your supplies could save hours of frustration later.

Credit: www.amazon.com
Preparing The Sink And Countertop
Preparing your sink and countertop correctly is crucial for a successful undermount kitchen sink installation. This stage ensures a perfect fit and a secure hold, preventing future leaks and damage. Taking your time here saves you from costly fixes down the road.
Measure And Mark Cutout
Start by carefully measuring your sink’s dimensions. Use the template that came with your sink or measure the outer edges if no template is available. Mark the exact cutout area on your countertop with a pencil, double-checking all measurements to avoid mistakes.
It’s smart to measure twice and mark once. You don’t want to accidentally cut too large or too small. Consider the thickness of the sink rim and any mounting hardware when marking.
Cut The Countertop
Now that your cutout is marked, prepare your tools. A jigsaw works best for most countertop materials, but for stone or solid surfaces, a professional-grade saw or a specialist might be needed.
Wear safety goggles and work slowly along the marked lines. Rushing can cause cracks or uneven edges, which will affect the sink’s fit. If you’re unsure about cutting the countertop yourself, ask a professional—it’s a small investment for peace of mind.
Clean The Edges
After the cutout, clean the edges thoroughly. Remove any dust, debris, or rough spots with sandpaper or a file. Smooth edges help the sink adhere better and create a watertight seal.
Don’t skip this step. I once overlooked cleaning the edges and ended up with a sink that didn’t sit flush, leading to water leaks. Taking a few extra minutes here can save you from headaches later.
Installing The Mounting Clips
Installing the mounting clips is a key step for securing an undermount kitchen sink. These clips hold the sink tightly against the countertop, preventing any movement or leaks. Proper placement and tightening ensure a strong, lasting fit.
Before attaching the clips, check the sink and countertop edges for any debris. Clean surfaces help the clips hold better. Gather all mounting clips and screws supplied with your sink for easy access.
Positioning The Mounting Clips Correctly
Place each clip evenly around the sink’s edge. Usually, clips go about every 6 to 8 inches. Align clips with the pre-drilled holes or the lip of the sink flange. This alignment keeps the sink stable and balanced.
Securing Clips With Screws
Use a screwdriver or drill to tighten the screws into the countertop. Tighten each clip gradually, moving from one to the next. This gradual tightening helps avoid uneven pressure on the sink.
Checking For Proper Fit And Seal
After all clips are tight, test the sink’s stability by pressing gently around the edges. Look for any gaps between the sink and countertop. If gaps appear, tighten clips slightly more. A good seal prevents water damage below the sink.
Credit: www.homedepot.com
Applying Sealant
Applying sealant is a crucial step when installing an undermount kitchen sink. It creates a watertight barrier between the sink and countertop. This prevents leaks and protects your cabinets from water damage. Using the right sealant and applying it carefully ensures a strong and clean finish.
Choosing The Right Sealant
Select a high-quality, waterproof silicone sealant. Look for one designed for kitchen use. It should be mold-resistant and flexible. Avoid sealants that dry too hard or crack over time. A good sealant lasts longer and keeps water out effectively.
Clean both surfaces thoroughly. Remove dust, grease, and old sealant residues. Use rubbing alcohol or a mild cleaner. Let the surfaces dry completely before applying sealant. This step helps the sealant stick better and last longer.
Applying The Sealant Evenly
Cut the tip of the sealant tube at a 45-degree angle. Use a caulking gun for smooth application. Apply a continuous bead of sealant around the sink rim. Avoid breaks or gaps in the sealant line. Smooth the bead with a wet finger or a sealant tool.
Securing The Sink In Place
Press the sink firmly against the countertop. Wipe off any excess sealant immediately. Use clamps or brackets to hold the sink securely. Allow the sealant to cure as per manufacturer instructions. Proper curing time ensures a strong seal and leak-free installation.
Positioning The Sink
Positioning the undermount kitchen sink is a key step in installation. It ensures the sink fits well and functions properly. Precise placement avoids leaks and damage. Careful positioning also helps maintain the countertop’s strength and appearance.
Measure And Mark The Cutout Area
Start by measuring the sink’s dimensions carefully. Mark the countertop with a pencil where the sink will sit. Use a template if available. Double-check all measurements for accuracy before cutting.
Check For Plumbing And Cabinet Clearance
Look under the countertop to ensure enough space exists. Verify pipes and cabinet structures do not block the sink’s position. Adjust the placement if needed to avoid obstacles.
Align The Sink With Countertop Edges
Place the sink so it is centered with the countertop edges. Keep a consistent gap between the sink and countertop for a clean look. This also helps with sealing and support.
Use Support Blocks For Stability
Install wooden or plastic blocks under the sink rim inside the cabinet. These blocks support the sink’s weight. Position them evenly to prevent shifting or sagging over time.
Apply Sealant Before Final Placement
Run a bead of silicone sealant around the cutout edge. This creates a watertight seal between the sink and countertop. Carefully lower the sink into place, pressing firmly to bond.
Securing The Sink
Secure the undermount sink tightly to the countertop using clips or brackets. Apply a bead of waterproof sealant around the sink edges to prevent leaks. Ensure the sink is level and firmly attached before the sealant dries.
Securing the sink is a crucial step in the installation of an undermount kitchen sink. This part of the process ensures that your sink is stable and will withstand the daily rigors of kitchen use. Without a secure fit, you could face issues like water leakage or even the sink detaching from the countertop.Preparing The Countertop
Before securing the sink, make sure your countertop is clean and dry. Remove any debris or dust that might interfere with the adhesive. This ensures a firm bond between the sink and the countertop.Applying Adhesive
Use a high-quality silicone adhesive to attach the sink to the countertop. Apply a generous bead of adhesive around the rim of the sink. This not only holds the sink in place but also seals the area to prevent leaks. Carefully position the sink below the countertop opening. Ensure it is perfectly aligned with the edges of the cut-out. It might help to have a friend assist you in holding the sink steady while you adjust its position.Installing Mounting Clips
Mounting clips play a pivotal role in securing the sink. Attach the clips to the sink’s flange and then tighten them to the underside of the countertop. This provides additional support and stability.Allowing Time To Set
Once everything is in place, give the adhesive time to cure. Check the manufacturer’s instructions for the recommended curing time. Avoid using the sink until the adhesive is fully set to ensure maximum durability. Securing an undermount kitchen sink might sound daunting, but with careful attention to detail, you can achieve a professional finish. Have you ever considered how a small oversight in this process could affect your kitchen’s functionality? Taking these steps seriously can save you from future headaches.Connecting The Plumbing
Properly connecting the plumbing ensures a leak-free undermount kitchen sink installation. Secure all pipes tightly and check for water flow before finishing the setup. This careful approach helps maintain a clean and functional kitchen space.
After you’ve securely mounted your undermount kitchen sink, the next step is connecting the plumbing. This phase involves attaching the drain and connecting the water lines. If you’ve ever wondered how to smoothly navigate this part of the installation, you’re about to find out. Let’s dive into the details to ensure your sink works perfectly.Attach The Drain
Begin by positioning the drain strainer in the sink’s drain hole. Use a plumber’s putty around the edge of the strainer to create a watertight seal. Press it firmly and wipe off any excess putty that oozes out. Underneath the sink, attach the rubber gasket and metal washer to the strainer. Secure them with the locknut. Tighten the locknut carefully using a wrench to avoid damaging the components. Next, connect the P-trap to the sink drain. The P-trap is crucial as it prevents sewer gases from entering your kitchen. Ensure it aligns properly with the drainpipe and tighten its slip nuts by hand for a snug fit.Connect The Water Lines
Start by turning off the main water supply to prevent leaks or water damage. Use a wrench to disconnect the old water supply lines from your faucet. Install the new flexible water lines, ensuring they’re the right length to reach the faucet without being overly tight or loose. Connect one end of the line to the shut-off valves and the other to the faucet. Tighten the connections with an adjustable wrench, but don’t overdo it. Over-tightening can damage the fittings, leading to leaks. Finally, turn on the water supply and check for leaks. If you spot any, gently tighten the connections until the leaking stops. Remember, each connection point is an opportunity for water to escape if not properly secured. Does your sink have a garbage disposal? If so, you’ll need to connect it as part of the drain setup. Ensure all components are correctly aligned to avoid any mishaps. Taking the time to connect your plumbing correctly not only ensures functionality but also prolongs the life of your kitchen sink. Have you faced any challenges while connecting plumbing fixtures before? Share your thoughts and tips below!
Credit: torva.com
Testing For Leaks
Testing for leaks is a crucial part of installing your undermount kitchen sink. It ensures that all connections are secure and prevents water damage later on. Skipping this step can lead to costly repairs and frustration down the line.
How To Prepare For Leak Testing
Start by clearing out any tools or materials from under the sink. This gives you full access to pipes and connections. Place a dry towel or paper towels under the drain area to catch any drips during the test.
Make sure all plumbing connections are tightened but not overtightened, as this can cause damage. Double-check that the gasket and sealant are properly installed around the sink edges. These small details can make a big difference in preventing leaks.
Performing The Water Flow Test
Turn on the water taps slowly and watch every joint and pipe carefully. Look for any signs of moisture or dripping. Check both hot and cold water lines separately to catch leaks specific to each.
- Run water for at least 2-3 minutes to simulate regular use.
- Use a flashlight to inspect dark or hard-to-see areas under the sink.
- Feel around connections with your hand for any wetness that might not be visible.
If you spot a leak, turn off the water immediately and tighten the connection or reseal the area. Keep testing until no moisture appears. Remember, even a tiny drip can cause damage over time.
Using Paper Towel Or Tissue For Leak Detection
Paper towels or tissues are simple but effective tools to detect leaks early. Press a dry towel against each connection and pipe while the water is running. If the towel gets wet, you’ve found the leak.
This method is especially useful for spotting slow or intermittent drips that might not be obvious at first glance. It’s a quick check that can save you from missing hidden leaks.
What To Do If You Find A Leak
Leaks usually come from loose fittings, damaged seals, or improper gasket placement. Tighten fittings gently with a wrench—avoid over-tightening, which can cause cracks.
If tightening doesn’t work, disassemble the affected part, clean the area thoroughly, and apply fresh plumber’s putty or silicone sealant. Replace any worn-out washers or gaskets before reassembling.
Have you ever discovered a leak only after your kitchen floor was soaked? Catching leaks early saves time, money, and stress. Don’t skip this step in your undermount sink installation.
Tips For Maintenance
Maintaining an undermount kitchen sink keeps it looking fresh and working well. Simple care steps prevent damage and extend the sink’s life. Regular cleaning and quick repairs protect the sink from stains and leaks.
Clean The Sink Daily
Rinse the sink after each use to remove food and soap residue. Wipe the surface with a soft cloth to prevent water spots. Avoid harsh chemicals that can damage the sink’s finish.
Check For Leaks Regularly
Look under the sink for any signs of water damage or drips. Tighten loose fittings to stop leaks early. Fix plumbing issues quickly to avoid costly repairs.
Use Gentle Cleaners
Choose mild dish soap or baking soda for cleaning. Avoid abrasive pads that scratch the sink surface. Test new cleaners on a small area first to ensure safety.
Protect The Sink Surface
Use a sink grid or mat to prevent scratches. Avoid dropping heavy pots or sharp objects inside. Dry the sink after use to reduce water stains and mineral deposits.
Maintain The Sealant
Inspect the sealant around the sink edges for cracks. Reapply silicone sealant if gaps appear to keep water from seeping underneath. Proper sealing prevents mold and water damage.
Frequently Asked Questions
What Tools Are Needed To Install An Undermount Kitchen Sink?
You need a drill, silicone sealant, mounting clips, a wrench, and plumber’s putty. These tools ensure secure and leak-free installation.
How Do You Prepare The Countertop For Undermount Sink Installation?
Clean the countertop edge thoroughly. Remove any debris and apply a bead of silicone sealant for a strong, watertight bond.
How Long Does It Take To Install An Undermount Kitchen Sink?
Installation typically takes 1 to 3 hours. Time varies based on skill level and countertop material.
Can I Install An Undermount Sink On Any Countertop?
Undermount sinks work best with solid surfaces like granite or quartz. They are not recommended for laminate countertops.
Conclusion
Installing an undermount kitchen sink takes patience and care. Follow each step slowly and check your work. Use the right tools to keep everything tight and secure. Seal the edges well to prevent leaks and water damage. Take your time and double-check the plumbing connections.
This will help your sink last longer and work better. A properly installed sink makes your kitchen look neat and clean. Enjoy your new sink and the easy cleanup it brings.