
Is your kitchen faucet leaking or just looking outdated? Changing out a kitchen faucet might seem tricky, but you can do it yourself—and save money while giving your kitchen a fresh new look.
Imagine turning on your tap and enjoying a smooth flow without any drips or hassles. In this guide, you’ll learn simple, step-by-step instructions that anyone can follow, even if you’ve never done plumbing before. Ready to upgrade your kitchen easily and confidently?
Let’s get started!
Tools And Materials Needed
Changing a kitchen faucet needs the right tools and materials. Proper preparation saves time and avoids frustration. Gather everything before starting to work under the sink. This section lists what you need for a smooth installation.
Essential Tools
- Adjustable wrench – fits various nut sizes
- Basin wrench – reaches tight faucet nuts
- Screwdriver – flathead or Phillips, for screws
- Plumber’s tape (Teflon tape) – seals pipe threads
- Bucket – catches water from pipes
- Towels – clean spills and dry surfaces
- Utility knife – cuts old sealant or tape
- Flashlight – improves visibility in dark areas
Choosing The Right Faucet
Select a faucet that fits your sink’s holes and style. Check the number of holes: one, two, or three. Measure the space under the sink for hoses and connections.
Pick a faucet with easy-to-use handles. Match finish color to your kitchen decor. Look for a faucet with a good warranty for peace of mind.

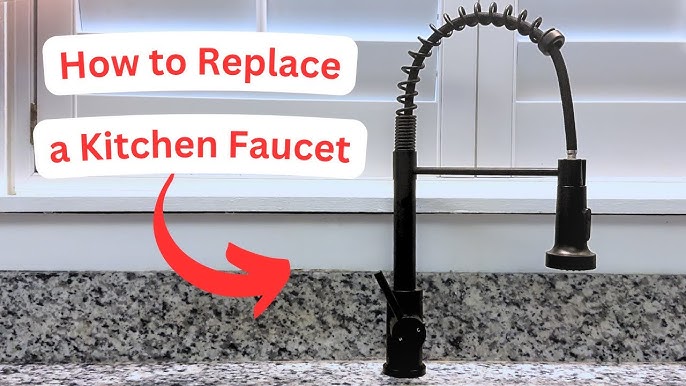
Credit: www.youtube.com
Preparing The Workspace
Preparing your workspace is the key to a smooth faucet replacement. It sets the tone for the entire job and can save you from unexpected hiccups. Clear, organized space helps you focus and makes the process less frustrating.
Shutting Off Water Supply
Before you touch any tools, make sure to turn off the water supply. Look under your sink for the shutoff valves—usually, there’s one for hot water and one for cold. Turn both valves clockwise until they stop to cut off the water flow.
If you don’t find valves under the sink, your home might have a main water valve. Shutting that off will stop water to the whole house, so be ready to explain this to anyone else at home.
Have you ever started a plumbing project without shutting off the water first? It’s an easy mistake, but it can lead to a messy flood. Take the time now to prevent that headache.
Clearing The Area
Remove everything from under the sink and around the faucet area. This gives you room to move and keeps your tools handy. A clutter-free area reduces the chance of knocking something over or losing small parts.
Lay down a towel or a small bucket to catch drips and debris. It might seem like an extra step, but it keeps your cabinets clean and makes cleanup faster.
Think about what tools and replacement parts you’ll need and arrange them within reach. Having everything ready before you start saves trips back and forth and keeps you in the flow.
Removing The Old Faucet
Removing the old kitchen faucet is the first task in the replacement process. This step requires careful handling to avoid damage to pipes or countertops. Gathering basic tools like a wrench and a bucket helps catch any water spills. Turn off the water supply before starting to prevent leaks. Prepare the area by clearing under the sink for easy access.
Disconnecting Water Lines
Start by turning off both hot and cold water valves under the sink. Use a wrench to loosen the nuts connecting water lines to the faucet. Place a bucket or towel below to catch any leftover water. Gently pull the water lines away once the nuts are loose. Check for any signs of corrosion or damage on the lines.
Unscrewing Mounting Hardware
Locate the mounting nuts holding the faucet to the sink. These nuts are usually found under the sink, directly below the faucet base. Use a basin wrench or adjustable wrench to loosen these nuts. Hold the faucet steady from above while loosening the hardware. Lift the faucet straight up and remove it from the sink surface. Clean the sink area before installing the new faucet.

Credit: www.youtube.com
Installing The New Faucet
Installing the new faucet is an exciting part of the kitchen upgrade. This step transforms the old setup into a fresh, functional fixture. Careful handling and correct placement will ensure your faucet works perfectly for years. Follow these tips to position and secure the faucet properly.
Positioning The Faucet
Place the faucet base over the sink holes. Align it so the handles and spout face the right direction. Check that the faucet sits flat against the sink surface. If the faucet has a gasket or rubber seal, set it under the base. This prevents water leaks under the faucet. Make sure all parts fit well before tightening anything.
Securing The Mounting Hardware
Underneath the sink, slide the mounting nuts onto the faucet shanks. Hand-tighten the nuts to hold the faucet in place. Use a basin wrench or adjustable wrench to tighten the nuts securely. Avoid over-tightening to prevent damage to the sink or faucet. Attach any washers or brackets included with your faucet kit. Double-check the faucet does not move after tightening the hardware.
Connecting Water Lines
Connecting water lines is a key part of changing out a kitchen faucet. This step ensures water flows properly to your new fixture. Pay close attention to how you attach the supply lines. Tight connections prevent leaks and water damage. After connecting, checking for leaks is crucial to avoid future problems.
Attaching Supply Lines
Start by attaching the supply lines to the faucet’s inlet valves. Hand-tighten each connection first. Use an adjustable wrench to give a gentle final turn. Avoid over-tightening as it can damage the fittings. Match the hot water line to the hot valve and cold to cold. Make sure the lines are not twisted or bent sharply. This keeps water flow steady and prevents leaks.
Checking For Leaks
Turn on the main water supply slowly. Watch all connections carefully for drips or moisture. Use a dry cloth to wipe around the joints. Check again after a few minutes to catch slow leaks. Tighten any connections slightly if you see water escaping. Proper inspection now saves costly repairs later.
Testing And Final Adjustments
Turn on the water and check for leaks around the new faucet. Adjust connections and tighten fittings to stop any drips. Ensure the faucet operates smoothly before finishing.
Changing out a kitchen faucet can be a satisfying project, especially when you see the gleaming new fixture in place. But the job isn’t quite complete until you’ve tested and made any final adjustments. This is where you ensure that everything works perfectly and your kitchen is back to functioning at its best.Turning On Water Supply
Once your faucet is installed, it’s time to turn the water supply back on. Slowly open the shut-off valves under the sink, allowing water to flow back into the pipes. This gradual process helps prevent any sudden pressure that could cause leaks or damage. As you turn the water on, keep an eye out for any signs of leaking around the connections. A small drop can indicate a loose fitting that needs tightening. Tighten carefully, ensuring you don’t overtighten, which could strip threads or damage seals.Ensuring Proper Function
With the water supply on, test the faucet by running both hot and cold water. Check for a steady stream and adjust the aerator if the flow seems uneven. If the water pressure is too low or too high, you might need to adjust the shut-off valves. Try switching the faucet from side to side to test for smooth movement. If it feels stiff, a gentle adjustment can help. Ensure the sprayer works seamlessly by pulling it out and testing its reach and retraction. Have you noticed any strange noises or vibrations? These could indicate air trapped in the pipes or a loose part that needs securing. Addressing these issues now can save you from future headaches. Remember, the goal is a leak-free, smoothly operating faucet. Taking the time to make these final adjustments ensures your kitchen remains a hub of efficiency and style.Tips For Maintenance
Turn off the water supply before removing the old faucet to avoid leaks. Use the right tools to loosen connections carefully. Clean the sink area before installing the new faucet for a secure fit.
Maintaining a kitchen faucet ensures its longevity and smooth operation. Proper care prevents leaks and buildup, saving you time and money. Here are some essential maintenance tips to keep your faucet in top shape.Regular Cleaning
Regular cleaning keeps your faucet sparkling and functional. Use mild soap and warm water for daily cleaning. Avoid harsh chemicals that can damage the finish. Clean the aerator monthly to remove mineral deposits. A gentle scrub with an old toothbrush works well. Rinse thoroughly and wipe dry with a soft cloth. This prevents water spots and keeps the shine intact.Preventing Common Issues
Prevent common faucet issues with routine checks. Inspect for leaks under the sink and around the base. Tighten loose parts to avoid drips. Replace worn-out washers and O-rings promptly. This reduces the risk of water wastage. Check the water pressure regularly. Low pressure might indicate a clogged aerator. Regular maintenance ensures smooth water flow and prevents major repairs.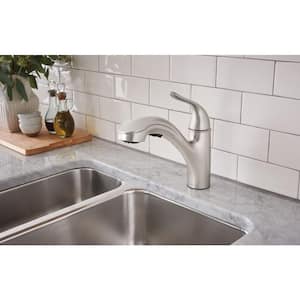
Credit: www.homedepot.com
Frequently Asked Questions
How Do I Remove An Old Kitchen Faucet Safely?
Turn off the water supply first. Disconnect supply lines with a wrench. Unscrew mounting nuts under the sink. Lift the old faucet out carefully to avoid damage.
What Tools Are Needed To Change A Kitchen Faucet?
You’ll need an adjustable wrench, basin wrench, screwdriver, plumber’s tape, and a bucket. These tools help disconnect old parts and install the new faucet securely.
How Long Does It Take To Replace A Kitchen Faucet?
Replacing a kitchen faucet usually takes 1 to 2 hours. Time depends on faucet type and your experience. Following instructions carefully makes the process quicker and easier.
Can I Change A Kitchen Faucet Without A Plumber?
Yes, most people can replace a faucet themselves. Basic tools and instructions are enough. However, call a plumber if you face leaks or complex plumbing issues.
Conclusion
Changing a kitchen faucet can be simple and quick. Follow each step with care to avoid leaks or damage. Use the right tools and check your work before finishing. Taking your time helps you get better results. A new faucet can improve your kitchen’s look and function.
Enjoy the fresh feel and easy use every day. Small fixes like this save money and add value. Try it yourself and see how satisfying a job done well feels.