
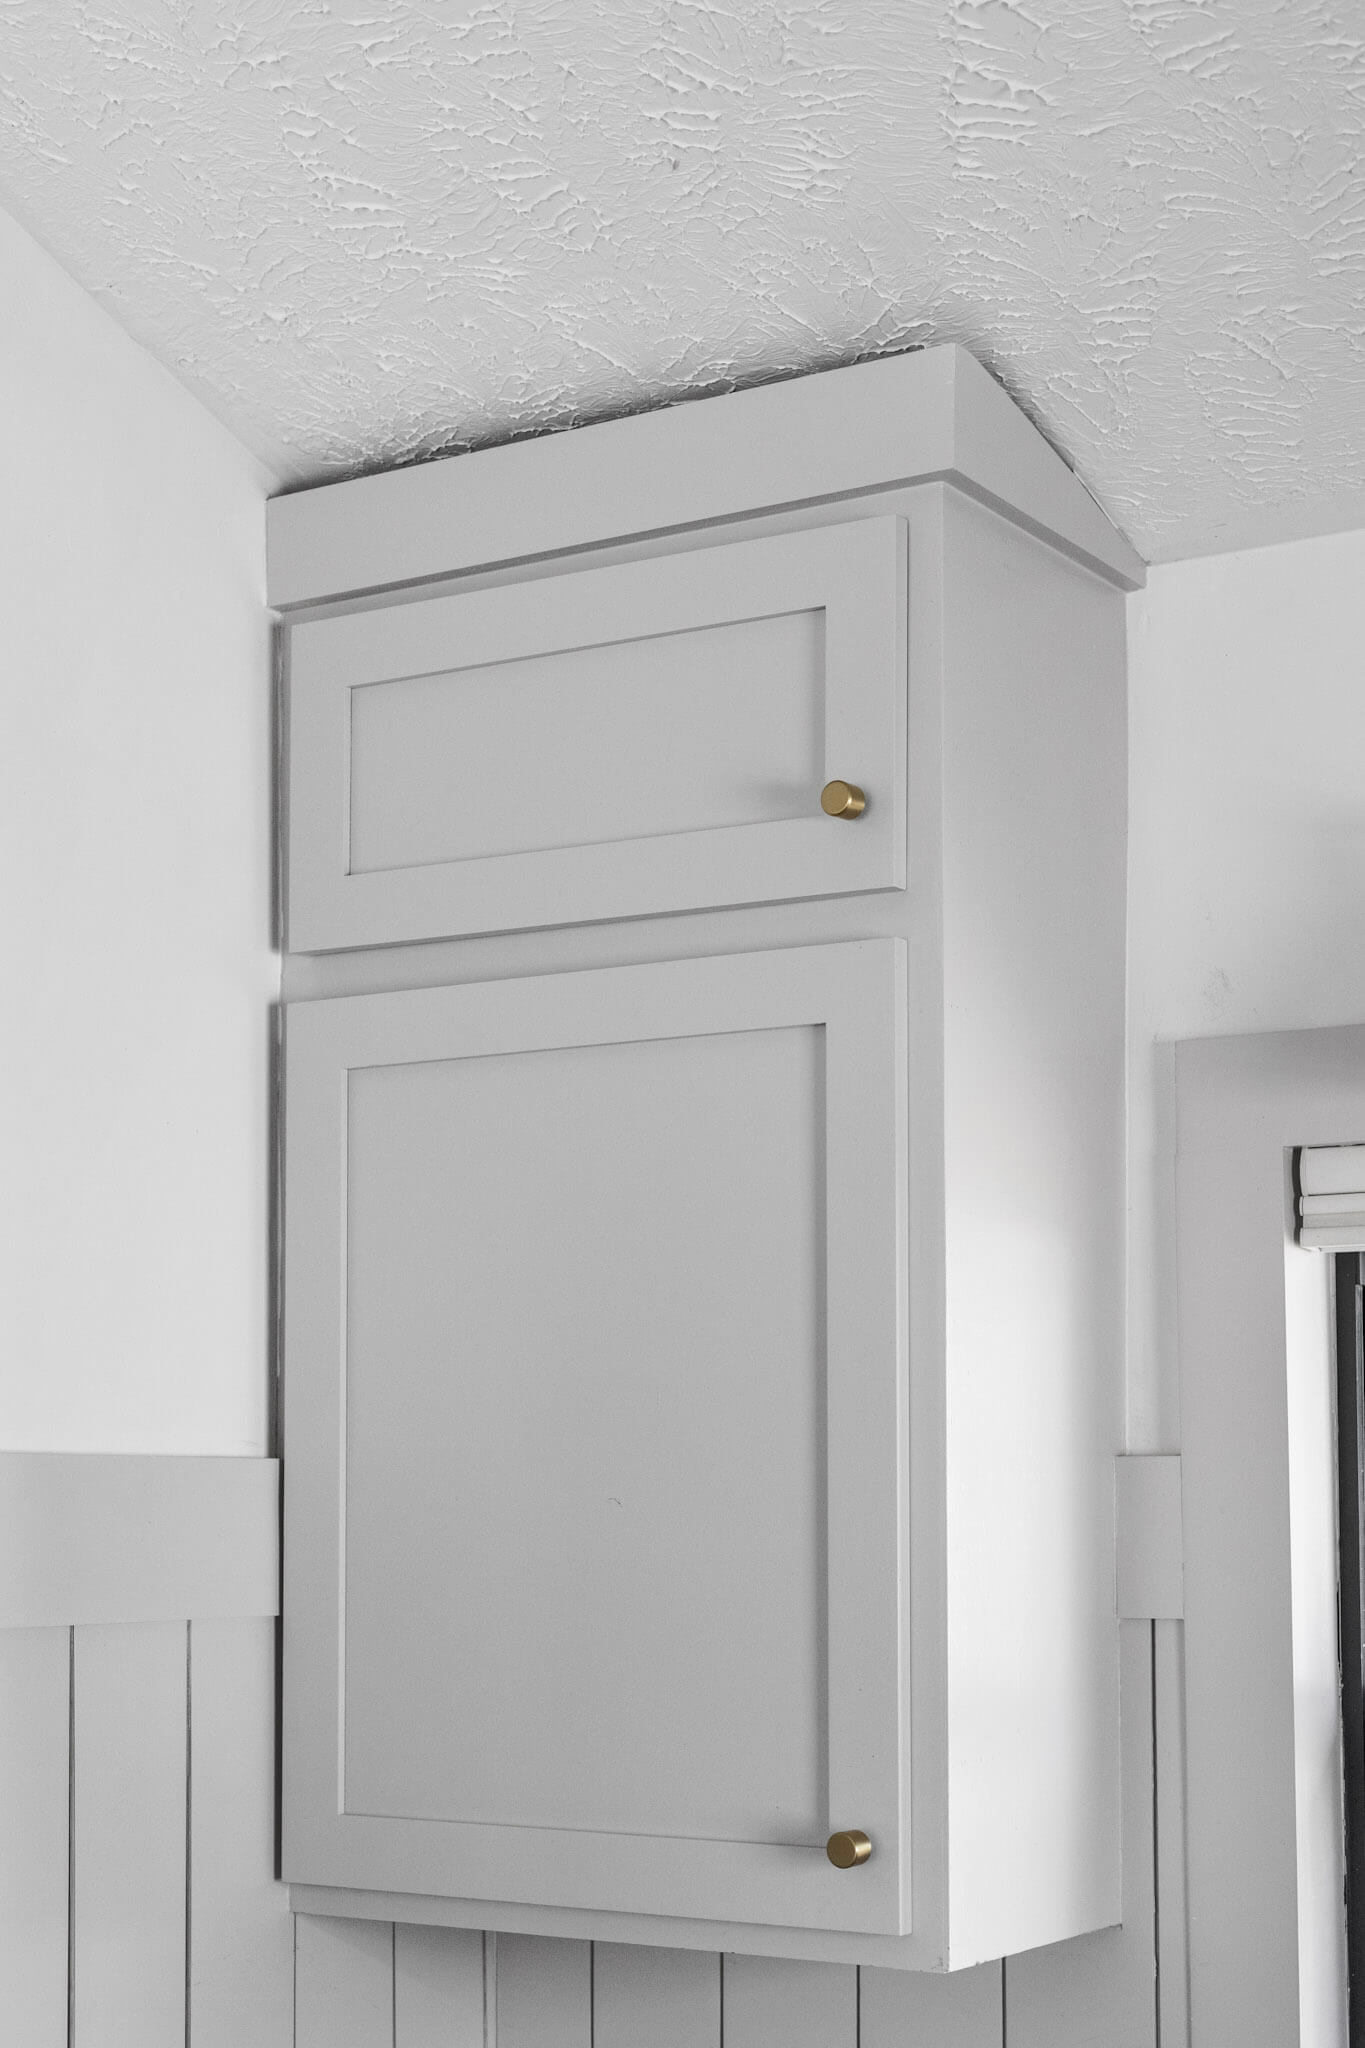
Are you looking to give your kitchen a quick and stylish upgrade? Adding crown molding to your kitchen cabinets is one of the easiest ways to add elegance and value to your space.
Imagine your cabinets with that perfect finishing touch that makes your kitchen look polished and custom-made. You’ll discover simple, step-by-step instructions to help you install crown molding yourself—even if you have little experience. Ready to transform your kitchen and impress everyone who walks in?
Let’s get started!
Tools And Materials Needed
Adding crown molding to kitchen cabinets transforms the space with a polished look. The right tools and materials make the job easier and ensure a perfect fit. Prepare everything before starting to avoid delays and mistakes. Below is a list of essential tools and materials for this project.
Measuring Tape And Pencil
Accurate measurements are crucial for a seamless installation. Use a measuring tape to get exact lengths of your cabinet tops and corners. Mark cut lines lightly with a pencil to guide your cuts. Double-check measurements to reduce errors.
Miter Saw And Nail Gun
A miter saw cuts molding at precise angles for perfect corner joints. A nail gun helps fasten the molding securely to the cabinets without much effort. Both tools save time and improve accuracy compared to manual methods.
Wood Glue And Caulk
Wood glue strengthens the joints between molding pieces. Apply it before nailing for better hold. Caulk fills small gaps between molding and cabinet surfaces. It creates a smooth, finished look and hides imperfections.
Crown Molding Types
- Wood: Classic and easy to paint or stain.
- MDF: Affordable and smooth, great for painting.
- Polyurethane: Lightweight, resistant to moisture and insects.
- Polystyrene: Budget-friendly and easy to cut.
Choose molding type based on style, budget, and durability needs.
Safety Gear
Protect yourself with safety glasses to shield eyes from dust. Wear ear protection to reduce noise from power tools. Use a dust mask to avoid inhaling sawdust. Gloves can protect your hands from splinters and sharp edges.

Credit: www.thisoldhouse.com
Preparing Cabinets For Installation
Preparing your kitchen cabinets for crown molding installation is a key step that sets the stage for a smooth and professional finish. Taking time to get your cabinets ready ensures the molding fits perfectly and sticks well. Let’s look at how clearing, cleaning, and measuring can make a big difference in your project’s success.
Clearing Cabinet Tops
Start by removing everything from the tops of your cabinets. This gives you full access to the surface where the molding will be attached. It also prevents dust and debris from settling on your items during the installation process.
Think about how often clutter accumulates in these spaces. Clearing them not only helps with the molding job but also gives you a moment to reorganize and declutter.
Cleaning And Sanding Surfaces
After clearing the tops, clean the cabinet surfaces thoroughly. Use a damp cloth with mild soap to remove grease, dust, and grime. A clean surface ensures the molding adhesive or nails hold strong.
Once dry, lightly sand the area where the molding will be attached. Sanding creates a rough texture for better adhesion and helps the paint or finish stick evenly. Don’t skip this step—it’s simple but critical.
Measuring Cabinet Dimensions
Accurate measurements are crucial. Measure the width and depth of each cabinet top carefully, noting any irregularities like curves or uneven edges. These details will affect how your molding pieces fit together.
Use a tape measure and jot down all dimensions. Double-check your numbers to avoid costly mistakes. Have you ever cut a piece too short or too long? Taking your time here saves frustration later.
Measuring And Cutting Molding
Measuring and cutting crown molding accurately is key to achieving a polished look on your kitchen cabinets. Mistakes here can lead to wasted material and a frustrating installation process. Taking your time and double-checking your measurements will save you both effort and expense.
Calculating Lengths
Start by measuring the top edge of each cabinet section where the molding will sit. Use a tape measure and write down each length precisely. Remember to add a little extra length for cutting adjustments and overlap at corners.
Don’t forget that cabinets rarely line up perfectly straight. Measure each segment individually instead of assuming all sides are the same length. This approach prevents gaps and uneven joints.
Cutting Angles For Corners
Crown molding corners require angled cuts to fit together snugly. You’ll need to determine whether the corner is inside or outside, as this affects your angle cuts. Typically, 45-degree cuts work for 90-degree corners, but cabinet corners can be slightly off, so measure the angle with a protractor or angle finder.
Set your miter saw to the correct angle before cutting. Practice on scrap pieces first to get a feel for the saw and ensure your angles match perfectly. If your corners are irregular, consider coping one piece for a cleaner fit.
Dry Fitting Pieces
Before gluing or nailing molding in place, dry fit each piece on the cabinets. This step lets you check for tight joints and proper alignment. If pieces don’t fit well, trim small amounts off the edges or recut angles as needed.
Dry fitting also helps you spot any unexpected gaps or uneven surfaces that could cause problems later. Take your time here—adjusting now is much easier than fixing mistakes after installation.
Attaching Crown Molding
Attaching crown molding to your kitchen cabinets can transform the look of your space, giving it a polished, custom finish. The process requires precision, but with the right approach, you can achieve professional results. Let’s break down how to firmly attach the molding so it stays secure and looks flawless.
Applying Wood Glue
Start by applying a thin line of wood glue along the top edge of the cabinets where the molding will sit. Use a small brush or a glue bottle with a fine tip to keep the application neat and controlled. This glue helps create a strong bond between the cabinet and molding, reducing the chances of gaps or loose sections over time.
Don’t overdo the glue; excess can squeeze out and create a mess that’s hard to clean. A little goes a long way, and it also allows you to adjust the molding slightly before it sets.
Nailing Molding In Place
After applying glue, hold the molding firmly against the cabinet and nail it in place. Use a finish nailer with 1 ¼-inch nails to avoid splitting the molding. Drive nails into the studs or solid wood parts of the cabinet for the strongest hold.
Make sure to nail at an angle to increase grip. If you don’t have a nailer, a hammer and finishing nails work too, but be gentle to avoid damaging the molding’s surface.
Securing Inside And Outside Corners
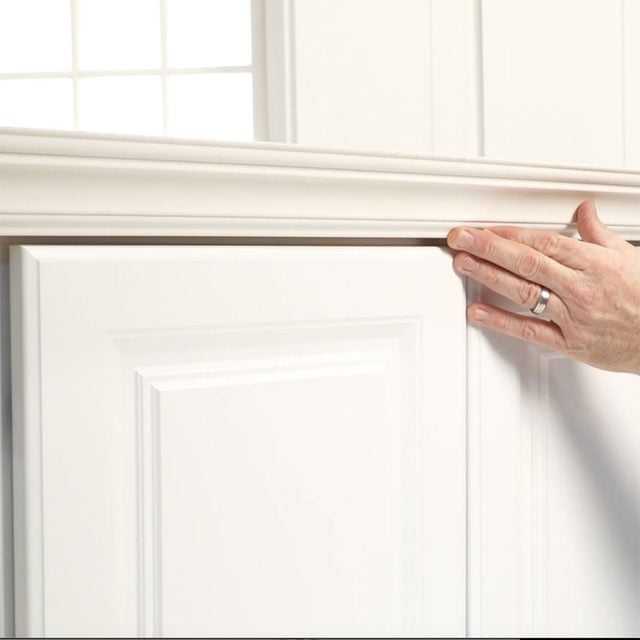
Inside and outside corners can be tricky because the molding pieces must fit together tightly. Use coping or miter cuts to ensure seamless joints. When attaching these corners, apply extra glue and carefully nail both pieces to the cabinet and each other.
Check for gaps and fill them with wood filler or caulk for a clean look. Have you noticed how tight corner joints instantly elevate the overall appearance? It’s worth taking your time here to get them just right.
Finishing Touches
Adding crown molding to kitchen cabinets is almost complete. The finishing touches make the difference between a good job and a great one. These small details create a smooth, polished look that highlights your hard work. Take time to perfect the edges, fill gaps, and finish the surface. This ensures your cabinets look seamless and elegant.
Filling Gaps And Nail Holes
Use wood filler to cover any nail holes and gaps. Apply it with a putty knife for smooth results. Let the filler dry fully before sanding. Sand lightly to blend the filler with the molding surface. This step hides imperfections and prepares the wood for paint or stain.
Caulking Edges
Run a bead of caulk along the edges where molding meets the wall or cabinets. Use a caulk smoothing tool or your finger to create a clean line. Caulking seals small cracks and prevents dust buildup. It also gives a finished look by softening hard edges.
Painting Or Staining
Choose paint or stain that matches your cabinets. Use a brush or small roller for even coverage. Apply thin coats to avoid drips and runs. Allow each coat to dry fully before adding the next. Finish with a clear protective layer if staining for durability.
Common Challenges And Solutions
Fitting crown molding to kitchen cabinets can be tricky due to uneven walls and corners. Using a miter saw and careful measuring helps create clean, precise cuts for a smooth finish. Patience and proper tools solve most common problems.
Adding crown molding to kitchen cabinets can transform a space beautifully. Yet, this project often comes with its own set of challenges. Understanding these hurdles and their solutions can make the process smoother. Below, explore common challenges faced during installation and practical solutions.Handling Uneven Cabinet Tops
Uneven cabinet tops can complicate molding installation. To address this, measure the height of each cabinet. Use shims to level the cabinets before attaching the molding. Secure the shims with nails or adhesive. Ensure they are flush with the cabinet top for a seamless look.Dealing With Complex Corner Angles
Corners can be tricky, especially with unique angles. Use a miter saw to cut precise angles. A coping saw can refine these cuts for better fitting. Practice on scrap wood to perfect your technique. This ensures accuracy and reduces material waste.Fixing Measurement Errors
Measurement mistakes can lead to gaps or misalignment. Double-check all measurements before cutting. Use a tape measure and mark clearly. If errors occur, trim or sand the molding for a better fit. Fill any small gaps with wood filler for a polished appearance.Maintenance Tips
Adding crown molding to kitchen cabinets elevates the room’s elegance. Proper maintenance ensures its beauty lasts for years. Regular care prevents damage and keeps the molding looking fresh. Here are some key maintenance tips to help you preserve its appeal.
Cleaning Crown Molding
Dust accumulates on crown molding over time. Use a microfiber cloth to gently wipe away dust. For stubborn grime, mix mild soap with warm water. Dampen the cloth and clean the surface carefully. Avoid soaking the molding to prevent damage.
Touching Up Paint
Paint may chip or fade with time. Keep a small amount of matching paint for touch-ups. Use a fine brush to apply a thin layer over chipped areas. Allow the paint to dry completely before applying a second coat. This maintains a seamless look.
Inspecting For Damage
Regularly check the molding for signs of wear or damage. Look for cracks, loose sections, or warping. Addressing issues early prevents further damage. Tighten loose nails or screws as needed. Repairing small problems quickly keeps the molding in top shape.
Credit: www.familyhandyman.com
Credit: crystelmontenegrohome.com
Frequently Asked Questions
What Tools Do I Need To Add Crown Molding?
You need a miter saw, measuring tape, nail gun, wood glue, and a level. These tools ensure precise cuts and secure installation.
How Do I Measure For Crown Molding On Cabinets?
Measure the cabinet width and height where molding will attach. Add extra for corner joints and overlaps.
Can I Paint Crown Molding Before Installation?
Yes, painting before installation saves time and avoids mess. Use primer and paint suitable for wood or MDF.
How Do I Cut Crown Molding Corners Accurately?
Use a miter saw set at 45 degrees for inside and outside corners. Practice cuts on scrap pieces first.
Conclusion
Adding crown molding to kitchen cabinets brings a fresh, finished look. It enhances cabinet style and adds value to your home. Take time to measure and cut carefully for the best fit. Use the right tools and materials to make the job easier.
With patience and attention, anyone can do this project. Enjoy your beautiful kitchen upgrade and the satisfaction of DIY work. Small changes can make a big difference in your space. Give your kitchen a classic touch that lasts.