
Are you tired of that leaky or outdated kitchen faucet? Removing it might seem tricky, but with the right steps, you can do it yourself and save time and money.
Imagine the satisfaction of upgrading your kitchen without waiting for a plumber. In this guide, you’ll find simple, clear instructions that make the process easy—even if you’ve never done it before. Ready to take control of your kitchen and start your faucet removal with confidence?
Let’s dive in!
Tools You’ll Need
Removing a kitchen faucet might seem tricky at first, but having the right tools makes the process smoother and less frustrating. Gathering everything beforehand saves you from unexpected trips to the hardware store. You’ll want tools that fit well, work efficiently, and protect your fixtures from damage.
Think about the last time you struggled with a rusty bolt or a stuck pipe. Did you have the right wrench or a good flashlight? Having the right tools is not just about convenience—it’s about making sure the job is done safely and correctly.
Adjustable Wrench
An adjustable wrench is essential because kitchen faucets come with nuts and bolts of different sizes. This tool lets you easily tighten or loosen these fittings without needing multiple wrenches. Look for one with a comfortable grip to avoid hand fatigue during the job.
Basin Wrench
This specialized wrench is designed to reach the hard-to-access nuts under the sink. Its long handle and pivoting head make it perfect for tight spaces where your fingers can’t fit. If you’ve ever tried removing faucet connections without one, you know how much easier this tool makes the task.
Bucket And Towels
Water will likely drip when disconnecting your faucet, so keep a bucket handy to catch spills. Towels are great for wiping up any water and protecting your cabinets from damage. These simple items can prevent a small mess from turning into a big cleanup.
Plumber’s Tape (teflon Tape)
After removing and before installing a new faucet, plumber’s tape helps seal threaded connections to prevent leaks. It’s inexpensive and easy to use but often forgotten. Having it ready means you can fix leaks before they start.
Flashlight Or Headlamp
Under-sink areas are usually dim, making it hard to see what you’re doing. A flashlight or headlamp frees up your hands and brightens your workspace. You’ll avoid fumbling around and save time by clearly seeing all connections.
Screwdrivers
Different faucets use various screws, so having both flathead and Phillips screwdrivers is useful. They help with removing decorative parts or securing mounting brackets. Choose screwdrivers with magnetic tips to keep screws from dropping into the sink.
Prepare The Workspace
Preparing your workspace is key before you start removing a kitchen faucet. It sets the stage for a smooth process and helps avoid unexpected messes or damage. Taking a moment to organize can save you from frustration later on.
Turn Off Water Supply
First, locate the water shutoff valves under your sink. These valves control the flow to your faucet, and turning them off stops water from spilling everywhere. If you can’t find dedicated shutoff valves, you may need to turn off the main water supply to your home.
Once the valves are off, open the faucet to release any remaining water pressure. This step prevents drips while you work. Have a small bucket or towel ready just in case a little water leaks out.
Clear The Area
Remove everything stored under the sink and around your workspace. Cleaning out this area gives you room to move and access the faucet connections without obstruction. It also protects your belongings from water damage or accidental knocks.
Lay down a towel or plastic sheet under the sink to catch any drips or debris. This simple action keeps your floor and cabinets clean. Have your tools and replacement parts organized nearby so you don’t waste time searching mid-task.
Disconnect Water Lines
Disconnecting the water lines is a crucial step when removing your kitchen faucet. It ensures that no water leaks or sprays while you work, keeping your workspace dry and safe. Before you start, make sure you have a bucket or towel handy to catch any leftover water in the lines.
Turn Off The Water Supply
Locate the shutoff valves under your sink. Turn both the hot and cold water valves clockwise until they stop to cut off the water supply.
If you don’t find individual shutoff valves, you may need to turn off the main water supply for your home. Have you checked this before starting any plumbing task?
Release Pressure In The Lines
After turning off the valves, open the faucet to release any remaining water pressure. You might notice a small drip—this is normal and helps prevent water from spraying when disconnecting.
Leaving the faucet open during disconnection is a simple trick I learned that saves from unexpected water bursts. Have you tried this before?
Use The Right Tools To Disconnect
Most water lines connect to the faucet with compression nuts or quick-connect fittings. Use an adjustable wrench to carefully loosen these nuts without damaging the pipes.
- Place a bucket underneath to catch drips.
- Turn the nut counterclockwise to unscrew.
- If fittings feel stuck, apply gentle, steady pressure rather than forcing.
Inspect Water Lines For Damage
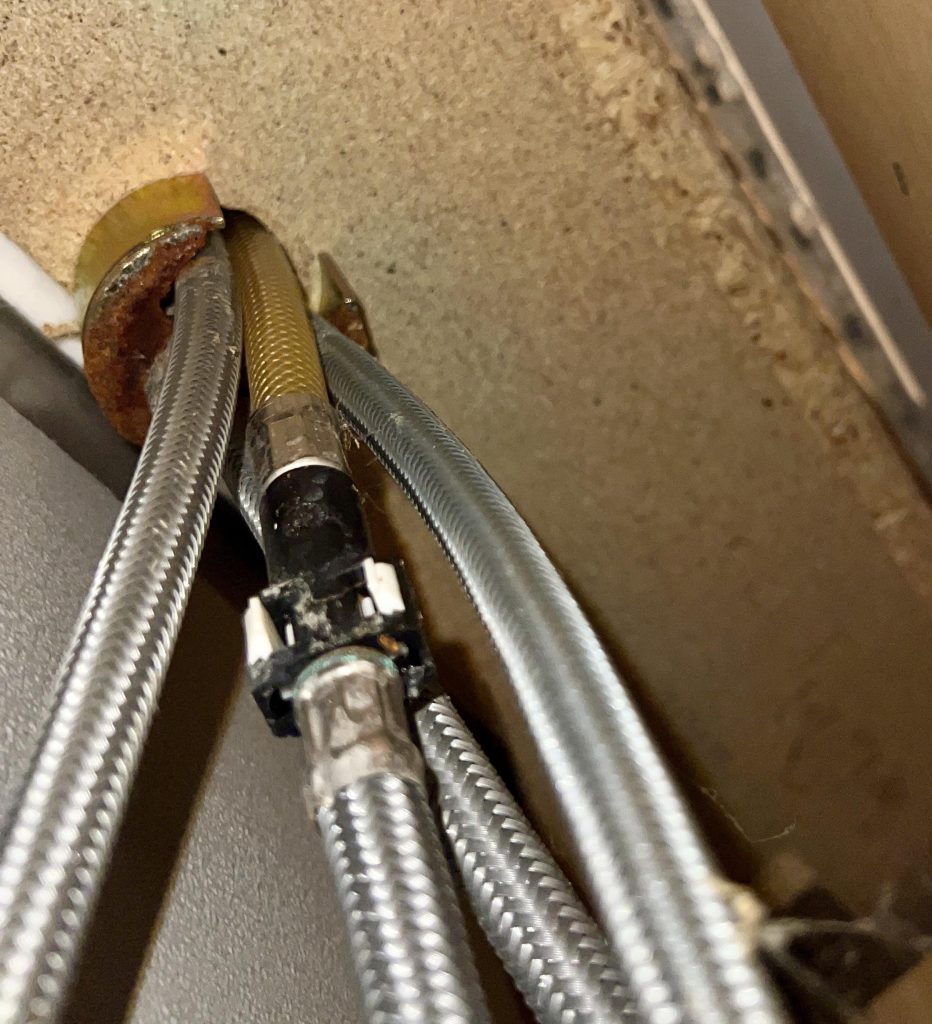
Once disconnected, take a moment to examine the water lines for cracks or corrosion. Old or damaged lines can cause leaks when you reinstall or replace your faucet.
Replacing worn-out lines now saves you headaches later. Have you checked your water lines recently?

Credit: www.reddit.com
Remove Faucet Mounting Hardware
Removing the faucet mounting hardware is a crucial step in taking out your kitchen faucet. This hardware holds the faucet securely to your sink or countertop. If you miss this part, the faucet won’t budge no matter how much you pull.
Before you start, make sure you have the right tools ready. This usually means a basin wrench, adjustable wrench, or sometimes a socket wrench. If your mounting nuts are rusted or stuck, some penetrating oil can make the job easier.
Locate The Mounting Nuts Under The Sink
Get under your sink and look up at the faucet base. You’ll see mounting nuts that hold the faucet in place. They’re usually threaded onto the faucet’s tailpieces.
These nuts can be hard to see and reach. Use a flashlight and a basin wrench to help you get to tight spots. Have you noticed how some kitchen sinks hide these nuts better than others?
Loosen The Mounting Nuts Carefully
Turn the nuts counterclockwise to loosen them. Sometimes, these nuts are tight, especially if they’ve been there for years. Patience is key here—force can damage your sink or faucet parts.
If a nut won’t budge, try spraying some penetrating oil and wait a few minutes. Then try again. This trick saved me hours once when a nut was completely frozen in place.
Remove Any Additional Brackets Or Plates
Some faucets have extra mounting brackets or decorative plates under the sink. These parts keep the faucet stable and sometimes cover the mounting nuts.
Check if your faucet has these, and remove them once the nuts are loose. Don’t forget—keeping track of all these small parts will make reinstallation smoother later.
Check For Residual Sealant Or Caulk
After removing the hardware, you might find some sealant or caulk around the faucet base. This can keep your faucet stuck even after the nuts are off.
Use a putty knife or scraper to gently remove any sealant. Be careful not to scratch your sink’s surface. This step ensures the faucet lifts off cleanly without damage.
Lift Out The Old Faucet
Lifting out the old faucet is a critical part of your kitchen upgrade. It’s where all your preparation pays off and the faucet finally comes free. This step might seem tricky, but with the right approach, you can do it smoothly and avoid damage to your sink or countertop.
Disconnect The Water Supply Lines
Before you lift anything, make sure the water supply lines are fully disconnected. Turn off the shut-off valves under the sink and use a wrench to loosen the nuts connecting the faucet to the water lines.
Sometimes, these nuts can be stubborn or corroded. Applying a bit of penetrating oil and waiting a few minutes often helps loosen them up. Have a bucket ready to catch any leftover water that might drip out.
Remove Mounting Nuts Or Clips
Look underneath your sink to find the mounting nuts or clips holding the faucet in place. These are usually screwed tight to a threaded rod extending from the faucet base.
Use a basin wrench or adjustable wrench to turn these nuts counterclockwise. If space is tight, a basin wrench is invaluable for reaching those hard spots. Once loose, the faucet should no longer be anchored to the sink.
Lift The Faucet Out Carefully
With all connections undone, gently lift the faucet straight up from the sink. It might need a little wiggling if it’s stuck from old sealant or mineral buildup.
Don’t rush or force it too hard. If the faucet resists, check again for any missed connections or fasteners. Removing the old faucet smoothly helps preserve your sink’s finish and makes the next installation easier.
Clean The Sink Surface
Clear the sink surface of any dishes or debris to create a clean workspace. Wipe the area to remove dirt and water before starting faucet removal. A clean surface helps prevent slips and keeps tools steady.
Cleaning the sink surface is an essential step in faucet removal. Over time, grime and residue build up around the faucet area. This can affect the installation of a new faucet. Ensure the surface is spotless for the best results.Remove Leftover Debris
Begin by wiping away any loose debris. Use a damp cloth to gather remnants. A small brush can help reach tight spots.Use A Gentle Cleaner
Select a mild cleaning solution. Apply it to the sink surface. Avoid abrasive cleaners that might scratch the sink.Scrub Stubborn Spots
For stubborn stains, use a soft-bristled brush. Gently scrub the affected areas. This will help remove tough buildup.Rinse Thoroughly
Rinse the entire sink area with water. Ensure no cleaning residue remains. A clean surface is vital for a secure faucet fit.Dry The Surface
Use a clean towel to dry the sink. This prevents water stains. A dry surface is easier to work on.Troubleshooting Common Issues
Removing a kitchen faucet can sometimes be tricky due to stuck parts or limited space. Using the right tools and careful loosening helps avoid damage and makes the process smoother. Checking connections and cleaning old sealant also prevents common problems.
Removing a kitchen faucet can be tricky. You might face some common issues. These problems can slow down your progress. Knowing how to handle them helps. Here, we discuss common challenges and solutions.Stuck Nuts
Stuck nuts are a frequent problem. They make removing faucets hard. Use a wrench for more grip. Apply penetrating oil to loosen them. Wait a few minutes after applying. If it still won’t budge, try gentle tapping. This can break up rust or debris. Be patient. Avoid using too much force. It can damage parts.Leaking Connections
Leaking connections are frustrating. They cause water damage if ignored. First, check all connections. Tighten any loose ones with a wrench. Inspect washers for wear. Replace them if necessary. Use plumber’s tape on threads. This can create a better seal. Test the faucet for leaks after adjustments. Ensure everything is dry before testing.Credit: www.diychatroom.com
Safety Tips For Diy Faucet Removal
Removing a kitchen faucet yourself can save money and give you a satisfying sense of accomplishment. However, it also comes with risks that you need to manage carefully. Taking simple safety precautions can protect you from injury and prevent damage to your plumbing or kitchen.
Turn Off The Water Supply Completely
Before you touch any tools, make sure the water supply is fully turned off. Don’t rely on just the faucet handles; locate and shut off the main valves under the sink. Have a towel or bucket ready to catch any leftover water in the pipes when you disconnect the lines.
Use The Right Tools And Wear Protective Gear
Using improper tools can cause slips and damage to your faucet or plumbing. Grab a good adjustable wrench and slip-joint pliers for better grip and control. Always wear safety goggles to protect your eyes from water spray or debris, and gloves to shield your hands from sharp edges.
Check For Electrical Hazards
If your faucet includes features like a sprayer with a light or an instant hot water tap, be aware of nearby electrical outlets or appliances. Water and electricity don’t mix, so ensure all relevant power sources are switched off before you begin. Have a flashlight handy if you need extra light in tight spaces instead of relying on electrical lamps.
Protect Your Sink And Countertop
Faucet removal can scratch or chip your sink or countertop if you’re not careful. Lay down a thick towel or a piece of cardboard under the faucet area to cushion any falling parts or tools. This small step keeps your kitchen surfaces safe and your repair job looking professional.
Test Your Setup Before Reassembly
After removing the faucet, double-check the pipes and fittings for any signs of damage or leaks. You want to catch problems early before installing a new fixture. Asking yourself, “Is everything dry and intact?” can save you time and frustration later on.

Credit: m.youtube.com
Frequently Asked Questions
How Do I Shut Off Water Before Removing A Kitchen Faucet?
Locate the water shut-off valves under the sink. Turn both valves clockwise to stop water flow. If no valves exist, shut off the main water supply to your home.
What Tools Are Needed To Remove A Kitchen Faucet?
You typically need an adjustable wrench, basin wrench, screwdriver, and pliers. These tools help loosen mounting nuts and disconnect water supply lines safely.
How Can I Prevent Water Leaks During Faucet Removal?
Turn off water supply and open the faucet to drain water. Use a towel to catch drips. Disconnect supply lines carefully to avoid water spills.
How Long Does It Take To Remove A Kitchen Faucet?
Removing a kitchen faucet usually takes 30 to 60 minutes. Time depends on faucet type, tools, and your experience level.
Conclusion
Removing a kitchen faucet is a simple task anyone can do. Follow the steps carefully and take your time. Turn off the water supply first to avoid spills. Use the right tools to make the job easier. Work slowly to prevent damage to pipes or counters.
Once done, you can install a new faucet or clean the area. Taking these steps helps keep your kitchen working well. Enjoy your fresh, updated sink space with confidence.